You Are My Sunshine – dt layout for Creative Embellishments

***Be sure to read the giveaway info at the end***

Hi, everyone! Another Thursday means I’m up on the Creative Embellishments blog with another project to share. πŸ˜€Β  This week, I created a layout using TONS of GORGEOUS Creative Embellishments laser cut chipboard pieces. If you didn’t already know, I LOVE their fabulous, high quality products and intricate, fun designs. To create this entire layout, I only used 1 sheet of pp and 2 doilies. Other than the stamping, everything else you see is made by Creative Embellishments! πŸ˜€

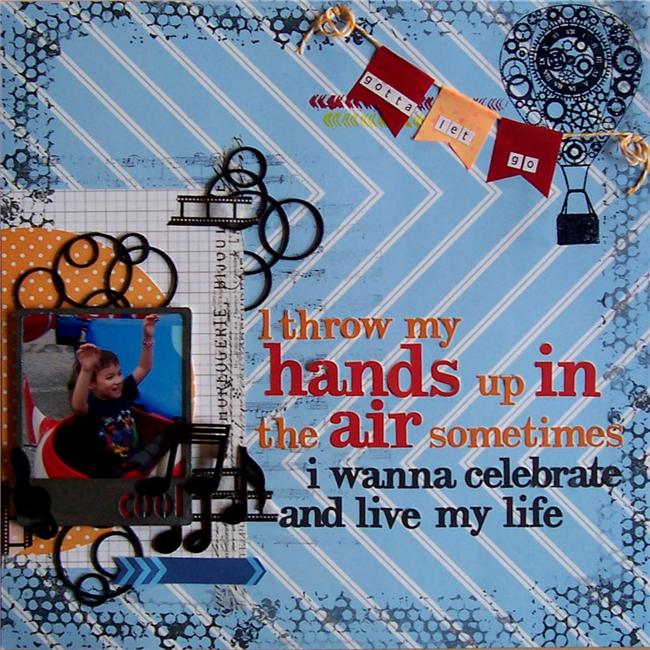
The pic I selected for my page is of my youngest son when he was a few months old. Any time I would leave the room, he was search for me even to the point of arching his back and doing back bends to look into the next room! It’s hard to tell in the photo, but that’s what he’s doing. A back bend just to see me. πŸ˜€ I was also inspired by the Monday mojo sketch over at the Flying Unicorn forum. Here’s what I came up with:

You Are My Sunshine lo

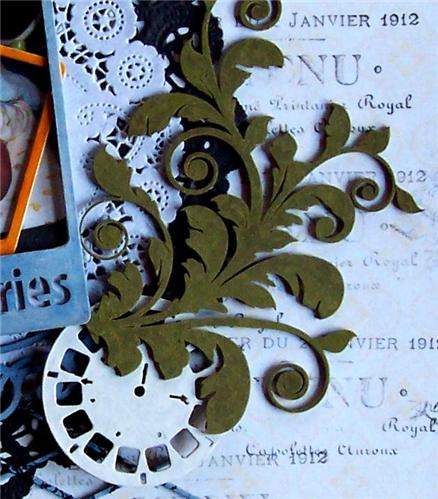
Close up of the cluster to the right of the photo:

You Are My Sunshine detail 1

Close up of the title piece (sorry it’s hard to read due to shadows):

You Are My Sunshine detail 2

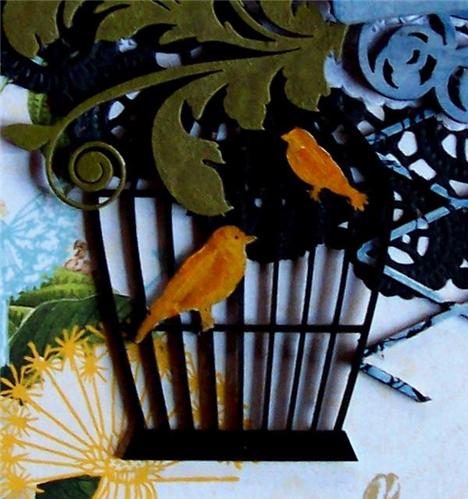
A close up of the bird cage piece:

You Are My Sunshine detail 3

Materials:

Creative Embellishments Time Flies Frame Set
CE Oval from the Mini Ornate Frames
CE Flourish Set 3
CE Bird cage 4 piece set
CE View Master Set of 5
CE Harlequin Lattice panel
CE Mini Ornate Title/Word Frame
CE You Are My Sunshine title piece
Webster’s Pages New Beginnings pp
2 doilies from my stash
3 Unity Stamp Co stamps
PITT Big Brush Markers
Gesso
Acrylic paint
Distress paints, stain and ink

TFL! Be sure to check out the Creative Embellishments November Challenge for your chance to win a $20 gc to the store! Also, their November Special…get FREE SHIPPING WORLDWIDE on all orders of $25 or more!!!

***GIVEAWAY!!! I currently serve on 3 design teams. If you visit all 3 of their blogs and become a follower (or if you already follow them), then leave me a comment on this blog post letting me know that you follow ALL 3, you will be entered for a chance to win a $10 gift certificate to the Creative Embellishments Store! To make it even easier to enter, I’ve linked each one here: SWAT, Sketchabilities and Creative Embellishments blogs.*** You have 1 week to enter! Comments to enter the giveaway must be left on this post by 11:59 pm EST on Thursday November 21, 2013. The winner will be randomly selected and is open to everyone worldwide.

Gotta Let Go – layout for sketchabilities sketch #102

Sketchabilities sketch #102 is now live! Karan’s new sketches have been fantastic to work with and so much fun! They’re wonderfully inspiring no matter what your scrapping style happens to be. They work beautifully for anything from CAS to mixed media and everything in between. πŸ˜€

When I looked at the circle elements on the sketch, I immediately thought of the wonderful chipboard circle panel that Nicolle recently sent me from Creative Embellishments and a FABULOUS steampunk hot air balloon stamp (I got to test out the prototype, so keep your eyes out for rubber stamps to be a new product added to their store!). Since I recently created a layout that featured smaller photos clipped to twine using mini clothespins, I decided to replace that feature on the sketch with a washi banner and add my title to it.

The photo on this layout features my son, Matthew. One of his favorite songs at the moment is TNT by Taio Cruz (some people know the song as Dynamite), so I used some of the lyrics from the song for the title and “journaling”. Here’s what I came up with:

Gotta Let Go

Here’s a close up of the hot air balloon. I heat embossed the stamped image using Lindy’s Stamp Gang embossing powder:

Gotta Let Go detail 2

This close up shows the circle panel that I snipped bits off of and used in a few spots on my page. I heat embossed the panel pieces to match the hot air balloon stamp:

Gotta Let Go detail 1

This close up shows some fabulous CE wood music notes. The frame is also by CE btw. πŸ˜€

Gotta Let Go detail 3

Materials:

Creative Embellishments Steampunk Hot Air Balloon stamp
CE Circle Panel
CE medium frame from the Handsome frame set
CE Music Notes Wood Cuts
Elle’s Studio papers
Webster’s Papers alpha stickers
twine from the Twinery
Washi tape
Lindy’s Stamp Gang embossing powder
Adirondack Embossing Powder
Distress Embossing ink pad
Distress Ink
Unity Stamp Co bg stamps

The fantastic sketch I got to work with:

sketch 102

TFL! If you’d like to play along w/sketch #102 at sketchabilities, CLICK HERE!

Treat Box and Card Set – dt project for Creative Embellishments

Wow! I can’t believe it’s Thursday again already! Time sure flies these days. I’m up with a project on the Creative Embellishments blog. This time, I decided to go off page again…I seem to be doing that a lot lately! With Halloween around the corner, I figured I’d make a super quick and easy tutorial for an altered/upcycled treat box and matching card. Here’s how it turned out:

treat box step 7

I started with the packaging left over from my phone’s silicone protective cover. I took out the insert and used it for the base of my tag which later becomes a bookmark for my kiddos once they’ve opened their treats. I cut a notch at the top where the display hook opening is so I can attach ribbon, fibers and trim and still close the case:

treat box collage

I covered both sides of the insert with patterned paper. I decided not to decorate this part further because the wrapped candy will be rubbing against the purple side and I didn’t want the other side to be too bulky to close. I then decorated the outside of the case w/the fabulous CE chippies which I altered with Distress paint, acrylic paint and Art Anthology Dimensional Crystal.

treat box collage 2

Lastly, I created a card to match using more CE laser cut chipboard pieces.

Happy Haunting card

Again, here’s my finished project:

treat box step 7

Materials:

Creative Embellishments laser cut pumpkin face
CE Halloween Cat
CE Halloween Witch
Pink Paislee Hocus Pocus papers
Webster’s Pages stickers
Distress Paints and ink
Art Anthology Dimensional Crystal
acrylic paint

TFL! Don’t forget Creative Embellishments also offers monthly challenges! You could win a $25 gc to the CE store! For more info about the October Challenge, CLICK HERE!

Together – dt layout for Creative Embellishments

Hey, everyone! It’s Thursday, so I’m up on the Creative Embellishments blog. :-D I like mixing things up, working different styles and even playing around with different types of projects (though I still seem to struggle with card making of all things! lol). So, my page today is a lot simpler and more straight forward than usual. One of the CE pieces I used is the film strip frame which is still a fave of mine. I simply dabbed and swiped it with a black paint dabber and voila…an eye catching frame for my pic of my only daughter with my youngest son. His favorite phrase at the moment seems to be, β€œYou’re my best friend”…which he says to all his siblings. ;-) They each beam with pride whenever he says it to them and give him tons of hugs and kisses whenever they hear it. He’s more than a little spoiled by their attention, but I guess that’s the perk of being the youngest. :-D

To tie in the frame piece w/the rest of the page, I also used 2 wood cuts. The movie projector and reel seemed like the perfect coordinating accents. To alter those, I used a black PITT big brush marker and acrylic ink. I find with smaller, more intricate pieces, I have more control of where I apply the color this way.


Here’s what I came up with:

together

Here’s a detail shot of the cluster w/the wood cuts:

together detail 2

Here’s a detail shot of another cluster on my page w/a WP bookmarker and dangling cameo which I altered with Smooch:

together detail 1


I was also inspired by the Scrap and Music challenge #12 which features and awesome sketch and song (Stop! by Erasure) for title inspiration:

Sketch #12_Ana Castro


and CSI Case #92 for this page.

csi 92


Nicolle and Mike have been working hard to get more GORGEOUS pieces designed and added to the Creative Embellishments store. NEW items are being added almost every day! Be sure to check often to see what’s new! :-D

Previous Older Entries Next Newer Entries