#Cute Pup – layout for Creative Embellishments

Hi, everyone! Doris here and after a week off, I’m back with a layout to share! I’ve been hoarding these fun 13arts papers for a little while and finally decided to break them out and use them for a page of my 2nd youngest son. This is an older photo that was taken when he was just 2 1/2 year old, but I couldn’t resist scrapping it using a combination of Creative Embellishments Dog Gone Cute and Firefighter wood veneers. 😀 Here’s what I came up with:

cute pup

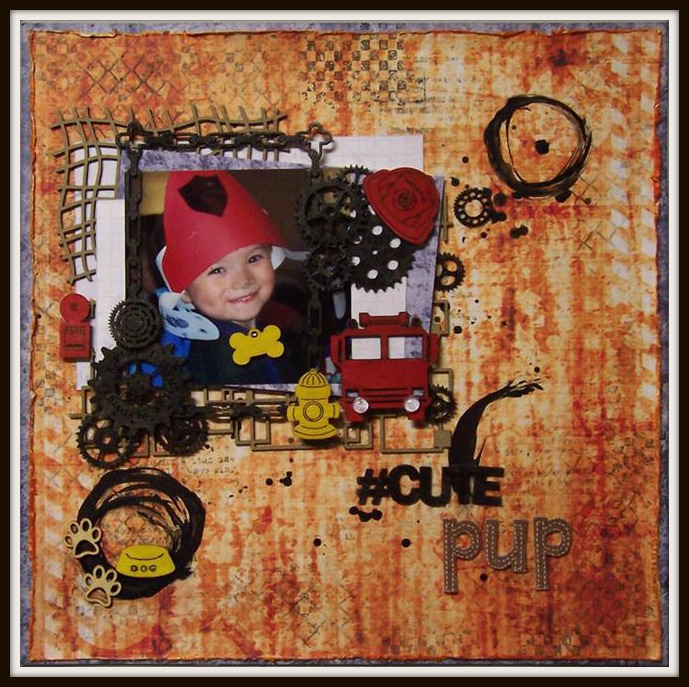
Here’s a close up of the top right cluster w/some gears and the firefighter’s helmet slung over them:

cute pup detail1

Here’s a close up of the bottom right cluster with the fire engine and hydrant:

cute pup detail 2

Materials:

Creative Embellishments distressed text stamp
CE Distressed Chicken Wire Stamp
CE distressed checkered stamp
CE dog gone cute wood veneers
CE Firefighter wood veneers
CE 6×6 mesh panel
CE 6×6 retro square panel
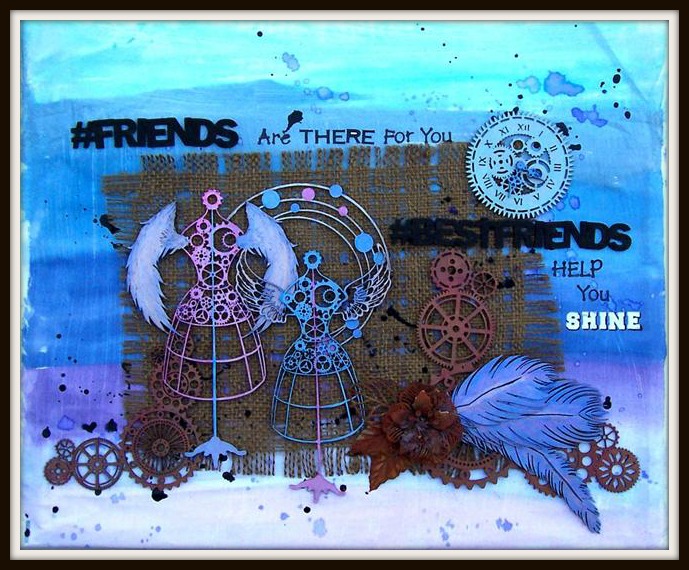
CE social hash tag titles
CE Steampunk chain and gears frame
CE 1 1/2″ gears
CE 1″ gears
CE 3/4″ gears
13arts paper
Design Memory Craft Pitt artist markers
india ink
Maya gold paint
thickers

TFL!


***Don’t forget…Everything is 25% off store wide now through April 28th, so don’t miss out!*** 😀

Advertisement

Altered Mixed Media Dust Cover – for Creative Embellishments

I’m up on the Creative Embellishments blog with another altered project to share this week. 😀 Here’s the back story. My desktop has been acting up for quite a while and seriously needs to be replaced. It’s very old, slow, keeps freezing for long periods at a time, shutting down on its own, etc. I’ve been putting up with it and just trying to limp by until we can afford to replace it (hopefully this summer).

Then, the other day, my AMAZING bestie sent me the most INCREDIBLE surprise! She sent me a metallic purple notebook pc! See my facebook page if you REALLY must know which one specifically. lol It arrived wrapped in a white dust cover, which I decided to hold onto. I figure I can put it in there when not in use. Since I’m hanging onto it and though I love the look of altered laptops, I just can’t make myself alter this precious gift I received, I decided to alter the dust cover instead. 😀 Here’s how it turned out:

dust cover

Close up of the dress forms. I altered them using Silks paints using our favorite colors and painting the opposite dressform’s supporting stem the other person’s favorite color to symbolize how we support one another. The paints are actually very shimmer and have gorgeous shine to them, but due to the time of day I took the pictures, you can’t really see the metallic shimmer:

dust cover detail 1

Close up of the mini steampunk clock piece. Layered Silks paints to create a sheer, shimmer glow to look like the moon:

dust cover detail 2

Close up of the lower right cluster with the feathers, gear corner and metal embellies:dust cover detail 3

Materials:

CE Steampunk dress form 1
CE Steampunk Dress Form 2
CE Steampunk Corner Set
CE Steampunk mini timepieces
CE Out of this World frame
CE Social Hash Tag title pieces
CE chipboard Feathers
Gesso
Distress Paint and Stains
Burlap
Silks paint
Lumiere paint
Dusty Attic Rusting Powder
Alpha stickers
Pitt Artist Markers
India Ink
Metal embellies

TFL!

Dare to Imagine…Just Dream – Canvas for Creative Embellishments

Hi, all! It’s Thursday again, so I’m up on the Creative Embellishments blog. 😀 This week I decided to go with an altered canvas using a ton of different CE laser cut chipboard goodies. I wanted to make a piece with a theme that went with the idea…If you can dream it, you can build it. A piece about the imagination, creativity and innovation, so to start I picked panel pieces that reminded me of things in technology, science and circuitry to tie in the circuit board section I wanted to incorporate. I then selected steampunk chippies of inventions that are ground breaking in their own time. I frequently think about the brilliant minds behind our everyday technology that we all now take for granted. Inventions that I’m sure when originally thought of, were considered out of reach, far-fetched or even crazy. 😀 I also added wings to symbolize ideas taking flight, hearts soaring following the realization of dreams…following your heart.

Here’s what I came up with:

Just Dream canvas

Close up of part of the title:

detail

Though the hands on the clock are missing in this pic, I did remember to add them after I’d taken the photo. The hands are green so they stand out from the clock face and they point to my current age:

detail 1

Close up of the awesome CE steampunk heart and part of a wing. I created more dimension on the wings by highlighting with interference paint:

detail 2

Steampunk Antique Bike layered over a light bulb:Detail 3

TFL!


Happy Birthday Wish – dt layout for Creative Embellishments

WOOHOO It’s birthday month over at Creative Embellishments. Not only is my birthday in April, but Nicolle and Sandi are also celebrating birthdays this month. 😀 Since Nic is turning the big 4-0 this year, she’s decided that for this month’s challenge, she’ll be giving away a $40 gc to the Creative Embellishments store to the winner! How awesome is that?

The challenge this month is use the inspiration image any way you’re inspired and select at least 4 items out of the list of 10 to use on your page. You may use any other embellishments you’d like, as long as you also incorporate at least 4 items from the list.

For my page, I was inspired by the birthday theme of the inspo image and the colors, candles, balloons, cake, stripes and dots. From the list, I was originally going to use most of the items, but had a change of plans, so instead I simplified and went with these 4 items: doodling, enamel dots, mist and paint, bling (rhinestones on the crown).

I was also inspired by Sketchabilities sketch #112, so I used the CE Rings for So Many things and View Master Photo Slides to replace the circular elements and flowers from the sketch. The wood pieces from the Birthday Fun wood veneer set were all altered using PITT artist markers. The word “wish” at the top of my page is actually cut from the Wishful Thinking title piece. The remaining 2 CE products I used for my page are the Happy Birthday title piece and the Wavy Music note border (which I left raw).


Here’s how it turned out:

Happy Birthday Wish


Here’s a close up of the top left cluster:

Happy Birthday Wish detail 1


The title:

Happy Birthday Wish detail 2


The bottom right cluster:

Happy Birthday Wish detail 3


Sketch #112 from sketchabilities:

sketchabilities #112


The CE April Inspo image:

April challenge


The list of 10 items (use 4 or more on your challenge entry):

Straws/rolled paper
trims- ribbon, lace, bakers twine or hemp
doodle
enamel dots or buttons
mist/paint
Texture paste, gesso
A handmade flower
embossing- dry or heat
Bling- Rhinestones or pearls
A flourish