Soar Tags

For my project today I was inspired by Tim Holtz’s March tag from 2015. I really loved working on these tags! So much fun getting in some crafty time and getting messy! 😀 I used different techniques products for the 2 backgrounds and altered my chipboard balloons using 2 different methods. For the tag on the left, I used Distress Stains and blotted my tag into the color on my non stick craft mat. For the tag on the right, I used distress paints and dragged the tag through the color, making sure I got good coverage for the base. I then used stazon ink in black and stamped light touches of the CE text stamp and brick, though most of that got covered by the time I was done. lol In TH’s example, he uses black ink and clear embossing powder for his stamped image, but wouldn’t you know my black ink ran out and I didn’t have a refill available, so I swiped my tags with a dryer sheet to help prevent stray bits of embossing powder from clinging to my background and used Versamark clear in with black embossing powder. I then used the same Steampunk Hot Air Balloon Stamp for both tags. I slipped on the tag on the left, as you can see, I smeared the image, but got it crisp on the one on the right. lol I used the same method for stenciling on both tags and just taped the tag to the back of the stencil to keep it from slipping and worked around the image rather than creating a mask. I immediately covered the modeling paste with embossing powder and set aside to allow it to dry fully before activating the embossing powder with a heat gun.

soar

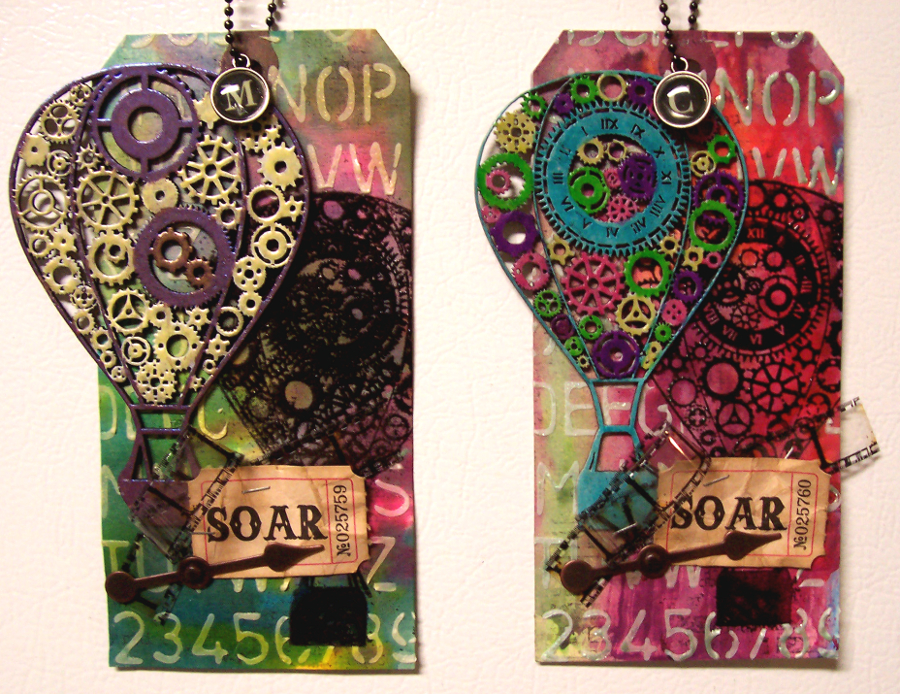
Though the 2 chipboard hot air balloons were both heat embossed, I altered them differently. For the one on the left, I used a versamark clear reinker and squeezed out a couple of drops onto my craft mat. I then dipped a paint brush into it and applied it to the areas I wanted purple, sprinkled it with the appropriate embossing powder and heat embossed that portion. Then coated the remaining portion lightly in gesso, applied the ink that part, and sprinkled it with a yellow embossing powder and heated that. For the one on the right, I coated the entire piece lightly with gesso, then colored the details with PITT markers, then used clear embossing powder on the whole piece to give it shine.


soar close up 1


soar close up 3


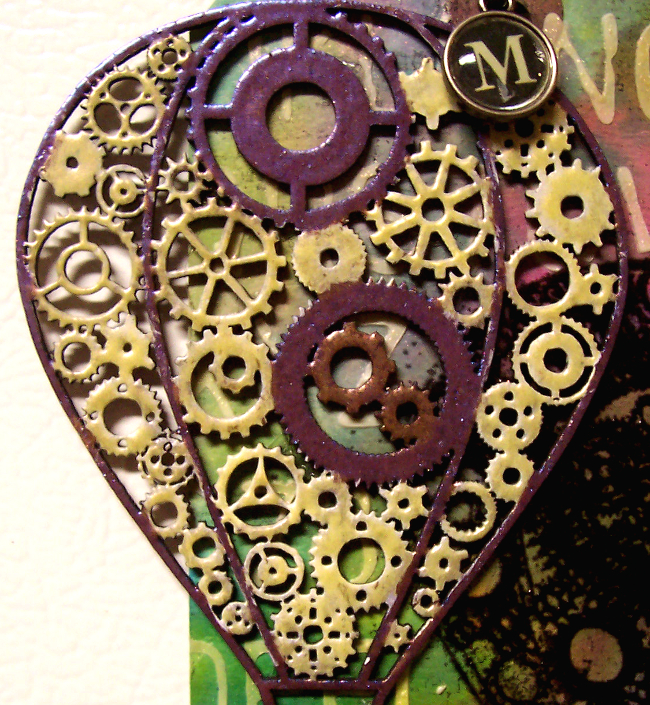
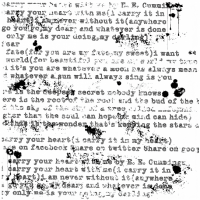
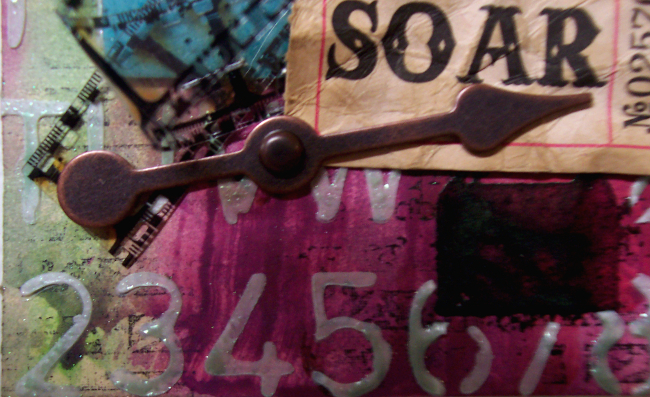
This pic just show s a bit of the stamping that got layered over:

soar close up 2


Hope you enjoyed my TH inspired project! Here are the fabulous CE products I got to play with on my project:

steampunk-hot-air-balloon-92-600x600steampunk ger mini hot air balloon-800x800steampunk-hot-air-balloon-stamp-410-600x600distressed-text-stamp-530-600x600distressed-brick-stamp-639-600x600

Advertisement

Happy Birthday, Wild One Card

My youngest son is turning 6 years old, in just 9 days. I’m still amazed at how quickly the kids are growing! Christian is our little Wild Child, so I thought a slightly rugged theme would suit him. To create the card, I started with the Distressed Text Stamp and stazon ink. I only inked sections at a time and blotted it to the card. I then used versamark ink and the Distressed Brick Stamp and positioned it where I wanted. Using a small wooden cuticle pusher, I added touches of light tan and dark brown embossing power to bits of the brick, then covered the rest with a terra cotta colored embossing powder, then melted with a heat gun. Last, I used a brayer to apply black acrylic paint to the Tire Track stamp and applied it across the card. I did want it darker than it is, but didn’t want to mess up the whole card front redoing that part. lol To alter the wood veneer balloons, youth bike, and title pieces, I coated them lightly with gesso, then went color by color using a glue pen and different embossing powders. Before adhering the embellishments, I splattered the background with Lindy’s Stamp Gang moon ink, Starburst ink, and India ink. I used foam adhesives to pop up the balloons and a flair button that’s meant to look like one of those circular mylar balloons. I added thread to act as strings for the balloons and added a bow to show that they’re attached to the handlebars of the bike. Here’s how my card turned out:

happy birthday wild one featured

happy birthday wild one full

A close up of the Bike:

happy birthday wild one close up 1

Close up of the title:

happy birthday wild one close up 2

The fabulous CE pieces I used:

youth-bike-660-600x600wild-one-title-368-600x600Happy Birthday-800x800birthday-fun-242-600x600tire-track-1-stamp-415-600x600distressed-text-stamp-530-600x600distressed-brick-stamp-639-600x600

Best Friends – Canvas

Creative embellishments chippies are so much fun to work with and so versatile! For this canvas, I simply applied a light gesso, then heat embossed to give them a wonderfully enameled look that makes the stand out from my project. As it happens, CE’s founder and head designer, Nicolle, is my best friend. She’s a true inspiration. Hardworking (did you know CE is family owned and operated? They do everything from design the pieces, cut them, weed them, package and sticker them, and ship them!), creative, uplifting, supportive, and more! I cannot imagine my life without her. I’m so blessed to have met her. ❤ So, my project is dedicated to my bestie, Nicolle. 😀

I started out by painting the canvas board with black gesso, then used white gesso and stencils for the corner work. I then used modeling paste with 2 other stencils for the other details (though much of it was covered by the flowers). Once that dried, I used Lindy’s Stamp Gang color shots on the white gesso . I used a heat gun to dry the links between colors. Next, I adhered the clock pieces in 2 different sizes, on either end of my project. I then clustered and layered the flowers, skeleton leaves, and leaves across my project. Last, I added the sentiment, heart piece, and title piece, which I cut in half to better fit my project. That’s another thing I love about all the CE pieces. Though thick and durable to withstand all your favorite wet mediums, they’re also easy to cut to suit your needs. 😀 Here’s how my project turned out:

BF full


Close ups:

bff close up 1


bff close up 2


bff close 3


bff close up 4


bff close up 5


CE products used on this project:

Capturebf border word-800x800large clock 1-600x600large clock 1-600x600

Peace – Mixed Media Canvas

Simplicity is the name of the game around my house these days. With school back in session and new undertakings, it’s easy to get overwhelmed, so my project for today’s post on the Creative Embellishments Blog is an easy to create/recreate, mixed media canvas that I find very soothing. It was inspired by this month’s challenge image as well. 😀 It reminds me of quiet, winter nights and softly drifting flakes, so I used 2 lines from the poem, “Stopping by Woods on a Snowy Evening” by Robert Frost.

I started off by masking off sections of the canvas with dry wall tape. I then used a palette knife to apply modeling paste in sections. I let it set for a few minutes, then removed the dry wall tape, which then leaves the grid texture behind. Once that was dry, I spritzed the entire canvas using several shades of Tattered Angels shimmer mist and Lindy’s Stamp Gang Starbursts, applying the lightest shades to the center and the darkest towards the edges. To blend the colors so there wouldn’t be spray shaped splotches of color, I went over the whole piece with a spray bottle of plain water. I then blotted up the excess moisture with a paper towel, and dried it with my heat gun.

I used Versa Mark ink and Lindy’s Stamp Gang EP with my CE Snowflakes stamp to add some more background details. I like to cut apart larger chippies to use on different parts of a project, which is what I did for this one. I altered my chippies by coating the Snowflake Page Corner pieces with gesso, and heat embossing the title piece. I finished it off with a bit of bling. I hope you like how it turned out!

peace


Close up of one of the altered chippies:

Peace close up 1


Close up of the background details:

peace close up 2

peace close up 3


The CE products used for this project:

snowflake corners-600x600love-joy-peace-327-600x600snowflakes-stamp-414-600x600

Previous Older Entries