Treat Box and Card Set – dt project for Creative Embellishments

Wow! I can’t believe it’s Thursday again already! Time sure flies these days. I’m up with a project on the Creative Embellishments blog. This time, I decided to go off page again…I seem to be doing that a lot lately! With Halloween around the corner, I figured I’d make a super quick and easy tutorial for an altered/upcycled treat box and matching card. Here’s how it turned out:

treat box step 7

I started with the packaging left over from my phone’s silicone protective cover. I took out the insert and used it for the base of my tag which later becomes a bookmark for my kiddos once they’ve opened their treats. I cut a notch at the top where the display hook opening is so I can attach ribbon, fibers and trim and still close the case:

treat box collage

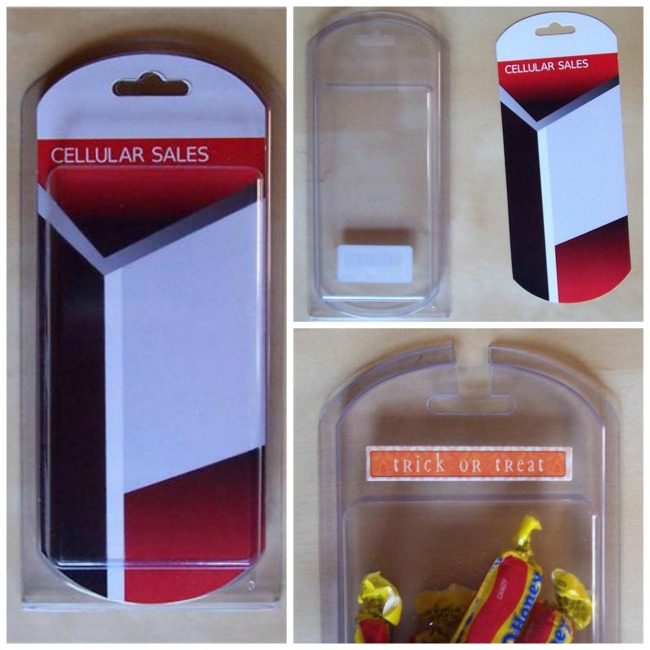
I covered both sides of the insert with patterned paper. I decided not to decorate this part further because the wrapped candy will be rubbing against the purple side and I didn’t want the other side to be too bulky to close. I then decorated the outside of the case w/the fabulous CE chippies which I altered with Distress paint, acrylic paint and Art Anthology Dimensional Crystal.

treat box collage 2

Lastly, I created a card to match using more CE laser cut chipboard pieces.

Happy Haunting card

Again, here’s my finished project:

treat box step 7

Materials:

Creative Embellishments laser cut pumpkin face
CE Halloween Cat
CE Halloween Witch
Pink Paislee Hocus Pocus papers
Webster’s Pages stickers
Distress Paints and ink
Art Anthology Dimensional Crystal
acrylic paint

TFL! Don’t forget Creative Embellishments also offers monthly challenges! You could win a $25 gc to the CE store! For more info about the October Challenge, CLICK HERE!

Advertisement

I’ve Been “Published” by Practical Scrappers!

Practical Scrappers has kindly published 2 of my layouts on their site, so I thought I would share the info and links. πŸ˜€ The first one is the one they featured more recently. It was my Let Them Eat Cake layout of Madison on her first birthday. I used all Webster’s Pages Lullaby Lane products, stickles, and chalk ink:

This one is featured on their Little Girl Projects post.

The second, Baby Kiwi, was actually published first, but I must have somehow missed their email that provided the publication banner. For this one, I used an older Bo Bunny line called Pet Shop and posted about it previously on my blog here if you’d like more info. This one was featured on their Little Boys Projects post:

TFL!

Comments are always welcome and appreciated. πŸ˜€ Be sure to stop by on Monday, April 25th for details on a fabulous, scrappy giveaway! It’s my birthday and I love to share! πŸ˜€

Baby Kiwi – Bo Bunny sketch challenge

Baby Kiwi was only in our family for a short period of time, but the kids still talk about her a lot. We miss her dearly. When we got her, Madison was only 3 years old and we didn’t name her right away. In the meantime, Madison kept calling her Baby Kitty which sounded like Baby Kiwi. That’s how she got her name. πŸ˜€

I created this layout based on a sketch on the Bo Bunny blog for their sketch challenge:

Materials:

American Crafts white cardstock base
Bo Bunny Pet Shop Words cardstock
BB Pet Shop Cat-Atude cardstock
BB Pet Shop Stripe cardstock
BB Pet Shop Sweater cardstock
BB Pet Shop Spot cardstock
Ranger Distress Inks

Adhesives:

Glue Arts Glue Glider Pro PermaTac
Scotch Quick Dry Liquid
American Crafts This to That foam dots

Tools:

Martha Stewart Edge/Border punch
Making Memories large and Medium heart punches

To take a look at the sketch I used for this layout or to check out Bo Bunny’s blog, CLICK HERE. TFL!