Alice in Wonderland themed LE for a swap – Creative Embellishments

Hi everyone! I recently participated in a loaded envelope (LE) swap coordinated by a facebook group (Loaded Envelope Galore). The criteria/requirements were pretty simple: The envelope had to be 4″ x 6″ with a minimum of 2 pockets, a large tag to fit the largest/main pocket, 1 envelope with tags, stickers, or other goodies that fit in it, 1 altered paper clip, 1 wand, at least 5 embellishments, at least 2 Alice in Wonderland inspired images, and 5 die cut outs.

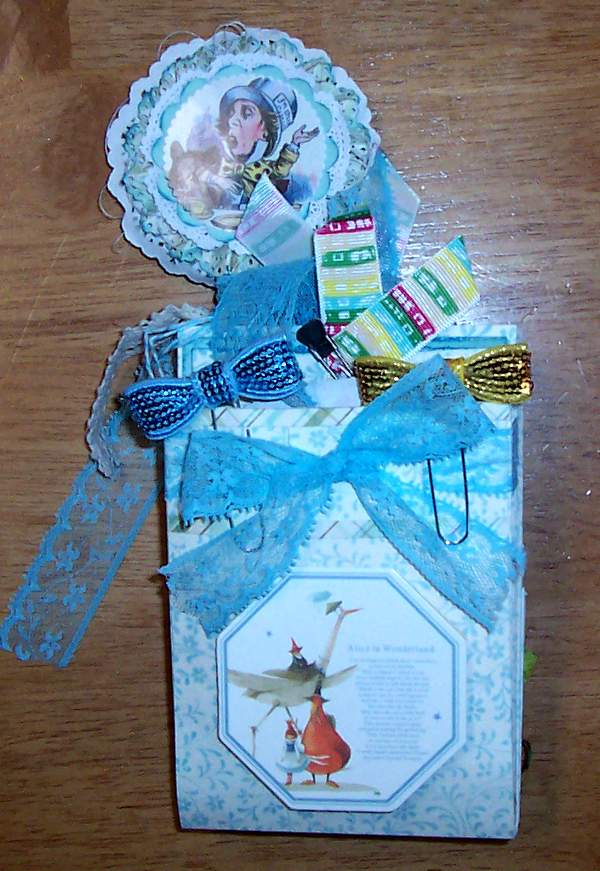
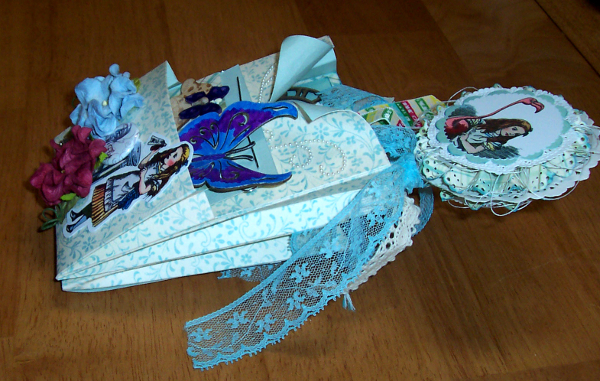
This is the first LE I’ve ever made and I even got to use tons of awesome Creative Embellishments goodies on it! I had so much fun creating this project for my swap partner, Raquel, and hope to participate in more swaps in the future! Here’s how it looks fully assembled and stuffed:


For the back, I added an additional gusseted pocket with reinforced slits to threat the lace tie through. The pocket drops open when the ribbon is untied, allowing it to hold more than a flat pocket would allow. I added an octagon shaped folded note with a quote from the book printed onto it. I wrote my partner a note inside:


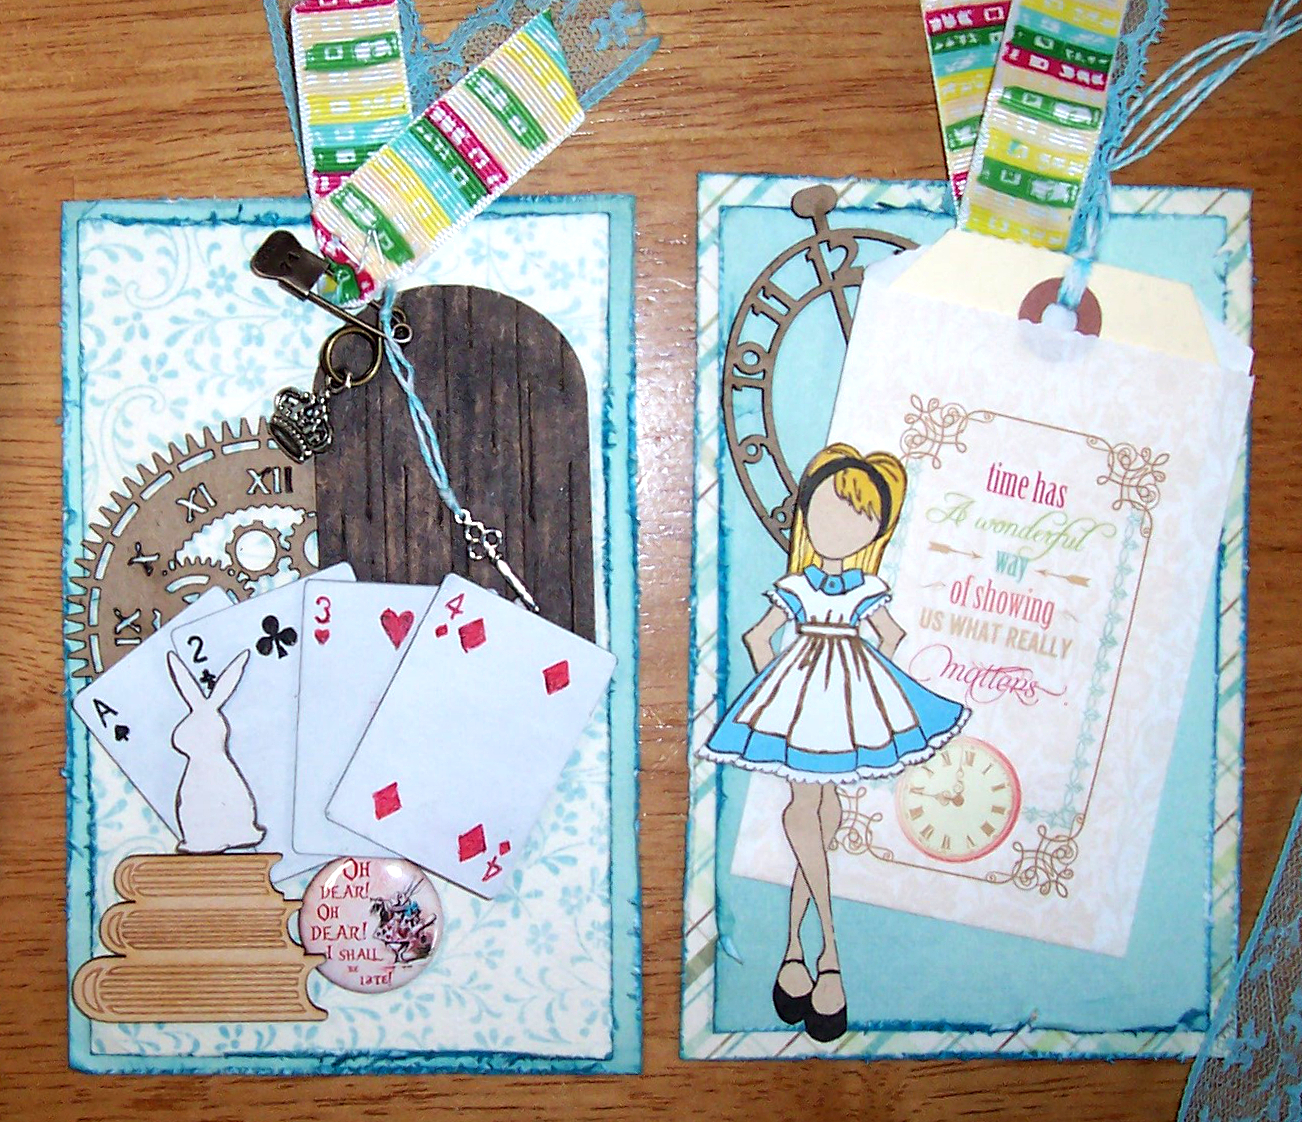
Here’s the pocket emptied out, shown here with the 2 large tags I created for it and the front of the wand:


Close up 1: Features a CE Butterfly Flair button.


Close up 2: The tag on the left features a book stack wood veneer piece from the Graduation Set, an adorable wood veneer Bunny, chipboard playing cards from the Family Game Night set, an adorable little door piece from the Fairy Door Set 1, and 1 Steampunk Timepiece. The tag on the right has a Mini Pocket Watch tucked behind the little Webster’s Pages baggie and the altered Julie Nutting doll. I couldn’t find a JN doll that quite matched what I had in mind, so I used the Candie design, trimmed the short hair off of the sides of her head and drew in long hair. I then sketched out an apron to layer over Candie’s dress, along with the collar, to make her look more like the Alice character.


Close up 3: To make this piece, cut 2 strips of patterned cardstock, punched one edge on each piece, then accordian folded them to create 2 separate rosettes. I adhered 1 on each side of a 3.5″ doily. I set that part aside and got the toppers ready by layering a die cut stickers over punched, scalloped circles, which I then adhered onto 2.5″ doilies. From there, I added the paper straw handle by inserting it between 2 folds on one of the rosettes. Next, I added some string and glued the toppers onto the rosettes to create the double sided wand. To finish it up, I added 2 different laces to the handle.


Close up 4: The back of the wand.


Some of the die cuts and embellishments I created and included. The bundle on the left is a stack of 3 die cut envelopes. The Webster’s Pages baggie on the right contains 4 diecut doilies and several gold accented stickers that I felt went with the Alice in Wonderland theme. 🙂


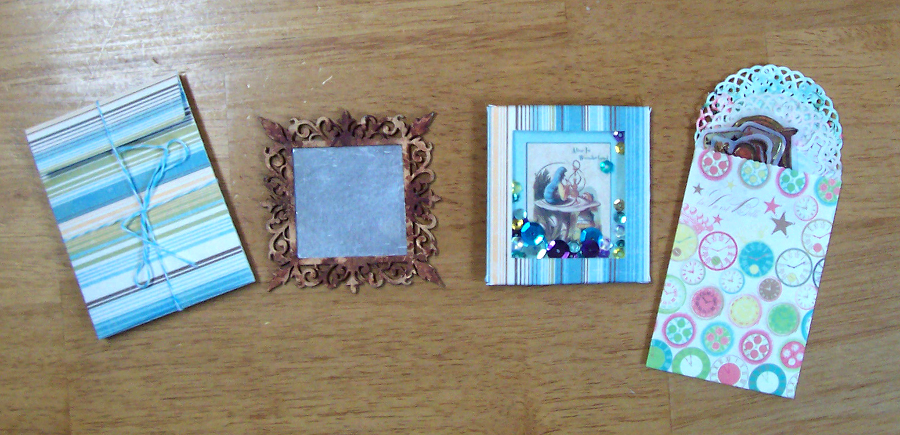
Close up 1: I used a CE Square Mini Frame to create a mirror embellishment with some foil tape (bought at a hardware store).


Close up 2: A little shaker box embellishment with an image of the caterpillar character inside. The sequins were actually left over from the product swap we had with SpiegleMom Scraps back in March.


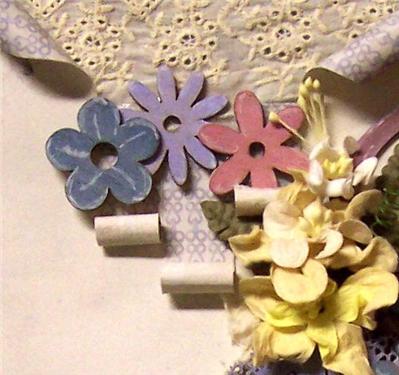
These are the altered paperclips I created for Raquel. The center piece at the top features 2 wood veneer Mushrooms from the CE store, the center one at the bottom includes an outlined Rose from set 2, and the one on the right has an altered Butterfly from a set of 5:


Image from the side showing the 3 gusseted pockets:

I hope Raquel liked what I created for her! On her youtube channel, you can check out her video tour of the incredibly generous package she sent me. She sent me sooo many awesome goodies that it’s actually split into 2 parts! She also has a separate video of her opening this LE that I sent her. 🙂

Part 1 of Raquel’s LE that I received: Raquel’s project part 1

Part 2 of the LE Raquel created for me PLUS the adorable mini she also included!!! Raquel’s project part 2

The super sweet video she made of her opening the LE I sent: Raquel opening the package I sent her

You can also check out her blog here: https://paintsandglitter.blogspot.com/

Advertisement

Soar – Creative Embellishments and CSI Case 161 plus Stuck?! Sketches April 1st challenge

Several members of the Creative Embellishments team are on the CSI, Color Stories Inspiration ning sharing how we cracked case 161. 😀 For my take on this challenge, also used a sketch from Stuck?! Sketches.

Here’s what I came up with:

soar framed

Close ups of the cluster to the left of my photo:

soar1

Close up of the view master slide chippies:

soar2

Here’s the Case 161 inspiration board:

161 flat

From the evidence column, I opted to include circles, a clock, wet mediums, and something that flies. From the testimony column, I went with journaling in a circular shape.

This is the fabulous Stuck?! Sketches sketch I used for my page:

4 April 1 2015 - Stuck

Materials:

Creative Embellishments Carousel Horses
CE Steampunk Gear Clock 3
CE View Master Photo Slides
CE Rings for So Many Things
Webster’s Pages pp
Pitt artist markers
Lindy’s Stamp Gang Flat Fabio mists
Lindy’s Stamp Gang Starburst Mists
Distress inks
Distress stains
gesso

Thanks for looking! I hope you play along with the CSI case files this month for your chance to win a Creative Embellishments gift voucher! Be sure to stop by the CE blog here to check out the rest of my team member’s examples: CE Blog and visit the csi ning to play along with their case files: CSI ning

To play along with the Stuck?! Sketches April 1st challenge, visit their blog here: Stuck?! Sketches.

Brother & Sister – dt layout for Creative Embellishments

Wow! I can’t believe it’s Thursday already! Time has been flying by so quickly! I’m up today with a layout to share on the Creative Embellishments blog. For my layout this week, I continued with pics from the same sitting as last Thursday’s page, but this time it features both Madison and Matthew. They are so cute together and as close as ever. I altered my chippies and wood pieces by applying a light coat of gesso, staining with Tim Holtz distress stains and highlighting with a white signo pen. My page was also inspired by the Mojo Monday sketch at Flying Unicorn

I’ve been struggling lately with my pages not turning out quite how I’d intended. It’s always a learning process and still fun to play around and keep on trying different things. The lower left portion w/my title is how I’d envisioned, but the rest isn’t quite where I’d wanted it to be and that is OKAY. Learning to let go and let it be is all part of the process. 😀 Here’s how my page turned out:

Brother and Sister

A close up of the top middle cluster:

Brother and Sister detail 1

Here’s the detail shot of the right cluster:

Brother and Sister detail 2

This is the portion that actually turned out how I’d envisioned:

Brother and Sister detail 3

Materials:

Creative Embellishments Heart Flourish Frame
CE Flourish Set 5
CE Family Words
CE mini Steampunk timepiece
CE Retro Flowers Wood Veneers
CE Peace Wood Veneers
CE Emoticons Wood Veneers
Pion papers
Webster’s Pages lace
I am Roses flowers
TH distress stains
White signo pen
twine

TFL! Be sure to check out the Creative Embellishments facebook page to see how YOU could WIN a $50 gc to their store! Also check out their blog to play along with our March challenge! 😀

Angel of Mine – dt layout for Creative Embellishments

I am soooo thrilled that today is the first reveal for the new dt at Creative Embellishments! I just love what everyone came up with for their examples for the March challenge. Be sure to stop by the CE blog and check it out! 😀

For my take on the challenge, I was inspired by the colors, placement of the colors, the flowers, butterflies and fairy wings from the inspo photo. There’s also a stunning sketch by one of our team members, Tammy, to combine with the inspiration image this month.

To create my page, I started with white cardstock and adhered crumpled tissue paper to the areas I wanted each color. Once dried, I went over the wrinkles lightly with gesso to bring out the texture. I then added a doodled border to go with the whimsical feel of the page and tied that in by outlining a few of the fussy cut flowers. All of my chippies have been altered with a silver gelato and PITT markers.  Here’s what I came up with:

Angel of Mine

The awesome inspiration image this month:

ce march insp image

The gorgeous sketch for the March challenge, created for us by Tammy Henderson:

ce march sketch

Materials:

Creative Embellishments Angel of Mine title piece
CE Flourish set #1
CE Butterflies
CE Ornate frame
Webster’s Pages New Year New You pp
Pink Paislee tissue paper
tissue paper from my stash
PITT artist markers
gelatos
gesso

TFL! To play along w/the challenge, just combine the sketch with the March image (in any way that it inspires you) and link up your project on the CE blog by Midnight EST on March 31st for your chance to win a $20 gc to the CE store! 😀

Previous Older Entries