Nail wrap file box – otp project for Creative Embellishments

Hi everyone! It’s Thursday, so I’m up on the Creative Embellishments blog with an off the page project for you today. 😀 I recently signed up as a consultant for Jamberry nail wraps along with my bestie Nicolle. Now that I’ve been with them a little while, I’ve built up quite a stash of nail wraps and needed a way to store and organize them. Luckily, I have a whole scrapbook stash to play with, so I created my own, using a coupon organizer type idea. There are separate compartments and I left room between the dividers and the top to add labels for my dividers later. Here’s now it turned out:

full


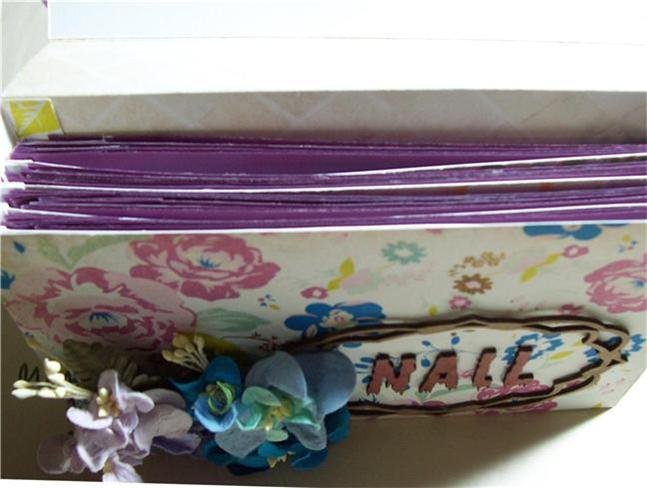
Close up of the dividers attached to the side. You can see I’ve left about half an inch for the tabs to be added:

detail 2


A close up of how they sit inside:

detail 1


Closed up with everything inside. I did not adhere the top of the frame or the flower cluster so that I can tuck the flap under them as a closure. 😀

Doris 5.29


Materials:

Creative Embellishments Art Flair
CE Ornate frames
CE Gooey Alphabet
Webster’s Pages papers, trim and bloomers
I am Roses flowers
Pitt artist marker
Martha Stewart border punch

TFL!

Advertisement

#, 5, hugs and kisses – layout for Creative Embellishments

Hi everyone! I’m up on the Creative Embellishments blog with a layout to share. 😀 This pic was taken almost 2 years ago and captures a little ritual that would happen several times a day, every day. Over and over again, Christian would say…Pound? Five? Hug? Kiss?…then all over again. 😀 Here he is slouched on the couch just like Daddy. 😀

hugs and kisses

Top cluster:

detail 1

Bottom left cluster:

detail 2

Materials:

Creative Embellishments Rock On flair
CE Hugs and Kisses title piece
CE Steampunk Corner set
CE Wood Veneer Hashtags
CE Wood Veneer Numbers
CE Wood Veneer Arrows
13 arts papers
Distress ink
Jacquard Lumiere paint

TFL!

Cards with pencil toppers – project for Creative Embellishments

Hi everyone, I’m up on the Creative Embellishments Blog this week with a couple of simple cards for children. Two of my kiddos are in cyber school and I’m always looking for different ways to reward and encourage them for a job well done and sometimes, just to reward their efforts. So quite a while back, I special requested these title pieces in order to use them for my own children and Nicolle was happy to oblige. She totally rocks! 😀 Did you know that if there’s something you have in mind, but do not find it in the store, a quick email to Nicolle could result in having it created for you? Yeah…she’s awesome that way. ;-D

Anyway, I’d originally intended them for tags they could display by their computers like ribbons, but at the last minute, I decided to make these interactive cards, with a reward attached. I’m all about simple these days since I’ve taken on a little more than I can chew for the moment, but I’ll adjust. lol So these cards, could be created with more layers, details, and elements, but I went with simplicity. Here they are assembled:

cards

This is with the toppers removed from the cards. As you can see, I just punched two holes to string the ribbon, or in my case tulle, through.

cards taken apart

Here’s how the topper looks attached to a pencil. Tip: If you find that it slides down your pencil, just wrap a small rubber band around the the end of the pencil as a stopper. 😀

pencil topper

TFL!

Like a Mother to Me – layout for Creative Embellishments

Hi everyone, it’s Thursday again, which means I’m up on the Creative Embellishments blog with a layout to share. This week, I went with a page featuring my mil. I’ll be honest, I really struggled with how to do this page. My mil is a very simple woman and likes simplicity. My daughter’s favorite color is purple (which I struggle with) and she loves flowers, but my mil likes CAS. What a really wanted to capture is what a wonderfully inspirational and fabulous role model she truly is. I hope I did her justice. For my page I incorporated one of the new fancy rectangle frames which I altered with a couple of different distress stains and blended together. I did the same with the antique clock which I topped off with one of the new Mother’s Day flair pieces and the green part of the Spring flourish. I then colored the flowers on the flourish using Pitt artist markers and while it was still wet, went over it with gesso to mute the color, yet have it bleed through. I worked it with the brush to draw out more of the color and create some variegation. Here’s how my page turned out:

Like a mother

TFL!

Previous Older Entries