Halloween Treat Bags – project for Creative Embellishments

Happy Halloween everyone! I’m up again at the Creative Embellishments blog with a project to share. This week, I decided to share a few little treat bags I created for my kiddos. These are real simple, quick, and easy to make, so they’d be a snap for Halloween parties and classrooms as well. For my base, I used the Tim Holtz In the Bag die, but you can easily find templates online that you can trace and cut out too.

***Be sure to check out the Creative Embellishments Store too! ALL Halloween items are 20% off (no coupon code required) now through the entire weekend!***

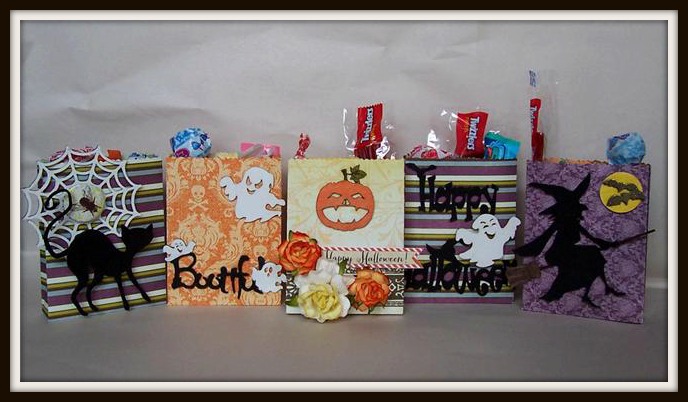
Here’s how my baggies turned out, decorated with tons of CE goodness:

Halloween Treat Bags

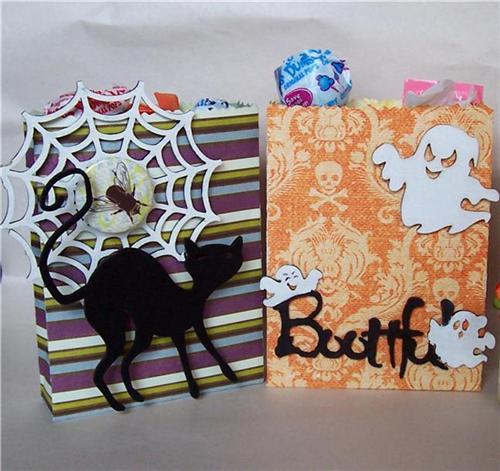
Close up of the 2 bags on the left:
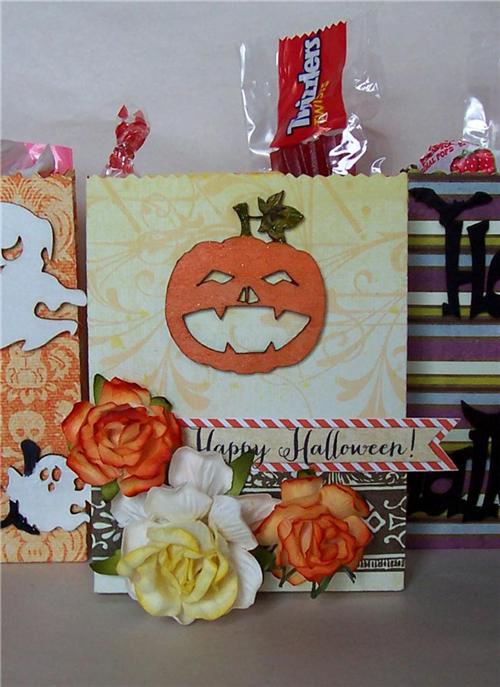
Halloween Treat Bags detail 1

The middle bag:

Halloween Treat Bags detail 2

The 2 on the right:

Halloween Treat Bags detail 3

Materials:

Creative Embellishments Web Panel
CE Halloween Cat
CE Bootiful Title piece
CE Ghost wood cuts
CE Pumpkin Wood Cuts
CE Happy Halloween title piece
CE Halloween Witch
Pink Paislee Hocus Pocus papers and button
sticker from my stash
Elle’s Studio cut out
I am Roses flowers
Distress stains and paints
Acrylic paint
Art Anthology Dimensional Crystals

TFL! Don’t forget: Today is the last day to take advantage of the October Special! Use coupon code save10 to get $10 off your order of $45 or more PLUS free domestic shipping!

Be sure to stop by tomorrow for the November Challenge post and to see what’s new for November! 😀

Advertisement

Treat Box and Card Set – dt project for Creative Embellishments

Wow! I can’t believe it’s Thursday again already! Time sure flies these days. I’m up with a project on the Creative Embellishments blog. This time, I decided to go off page again…I seem to be doing that a lot lately! With Halloween around the corner, I figured I’d make a super quick and easy tutorial for an altered/upcycled treat box and matching card. Here’s how it turned out:

treat box step 7

I started with the packaging left over from my phone’s silicone protective cover. I took out the insert and used it for the base of my tag which later becomes a bookmark for my kiddos once they’ve opened their treats. I cut a notch at the top where the display hook opening is so I can attach ribbon, fibers and trim and still close the case:

treat box collage

I covered both sides of the insert with patterned paper. I decided not to decorate this part further because the wrapped candy will be rubbing against the purple side and I didn’t want the other side to be too bulky to close. I then decorated the outside of the case w/the fabulous CE chippies which I altered with Distress paint, acrylic paint and Art Anthology Dimensional Crystal.

treat box collage 2

Lastly, I created a card to match using more CE laser cut chipboard pieces.

Happy Haunting card

Again, here’s my finished project:

treat box step 7

Materials:

Creative Embellishments laser cut pumpkin face
CE Halloween Cat
CE Halloween Witch
Pink Paislee Hocus Pocus papers
Webster’s Pages stickers
Distress Paints and ink
Art Anthology Dimensional Crystal
acrylic paint

TFL! Don’t forget Creative Embellishments also offers monthly challenges! You could win a $25 gc to the CE store! For more info about the October Challenge, CLICK HERE!