There She Goes – Lily Bee Sketch Challenge

Wow! Ask and they deliver! Just last Monday on the Lily Bee Blog, they asked what we, as the readers, would like to see on their blog. A bunch of us made suggestions and one thing that came up frequently was challenges. Then, just 2 days later, what did I see? An awesome sketch challenge!!! 😀 To qualify, just use the sketch as your inspiration and use at least 2 Lily Bee products. Easy, right?

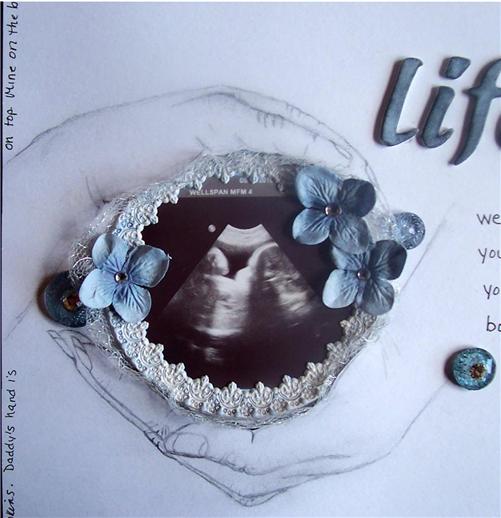
Since the sketch incorporates some fab circle elements, I immediately thought of these photos of Madison that I took last year. We were at Taten’s football game and she was bored. Larry jokingly told her to run a few laps. She happily jogged along chatting w/the other runners and jogging in place at times waiting for someone to catch up (all the other runners that day were adults looking for a bit of exercise!). Before we knew it, she’d run 4 laps around the track which is 1 mile, so we had her stop. lol Here’s my take on the sketch (the 3 paper circles and 1 stitched one representing her 4 laps):

Materials:

Lily Bee This and That Pretty Fabric 12×12 PP
Lily Bee T&T Brooch 12×12 PP
Lily Bee Linens 12×12 PP
Lily Bee Stationary Tomato 12×12 PP
Lily Bee Stationary Oatmeal 12×12 PP
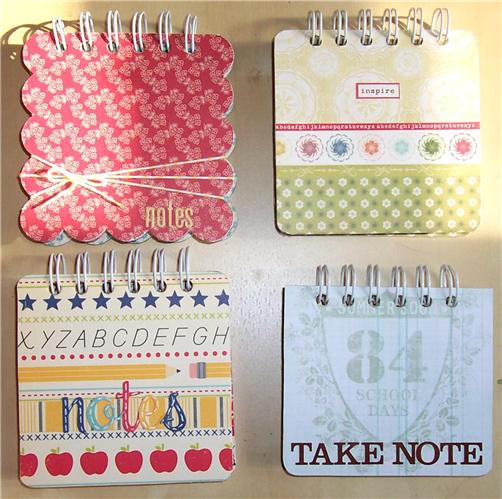
Lily Bee This and That Stickers
Lily Bee ABC Stickers
India Ink
Twine
DMC embroidery floss

Adhesives:

Helmar Quick Fix Adhesive Runner
Helmar 450 Quick Dry
Helmar Acid Free Glue
Helmar Liquid Scrap Dots
Helmar Zap Dots

Tools:

Martha Stewart Circle Cutter
We R Memory Keepers Sew Easy

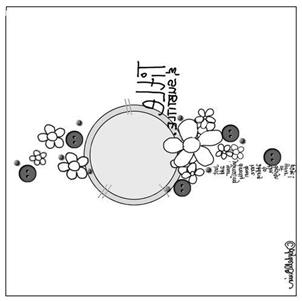
This is the fab Lily Bee challenge sketch:

TFL!

Advertisement

Post-It Note Holders – Inspired by Helmar

Nearly every Monday, Helmar has live Ustream classes that are really fun to watch. The ladies that participate each week are so much fun to chat with and there’s a different creative project featured each week. On August 22, 2011, Tracy was the host (sometimes it’s Jess aka Kinderstampo), and she made the cutest little post-it note holders that I thought were just perfect for teacher gifts! This year I needed to create 5 gifts (Matthew’s teacher is on maternity leave after having baby number SEVEN so he has a long-term sub). Here’s the link to her recorded show: Note Holder Tutorial

In the video, Tracy shows how easy they are to make using regular square coasters with rounded corners, but I didn’t have any on hand and it didn’t seem likely that I could just duck into a restaurant and grab a few. lol But…last week Larry happened to be waiting for the car to be inspected and went to lunch with his boss. While out, he actually remembered that I needed some and snagged me 10. So he not only remembered that I needed them, but also remembered how many! How great is THAT?!! 😀

Anyway, I decided to make one a little different and used a 4×8 scalloped chipboard rectangle that I cut in half to create the 4×4 size I wanted. On another one, I trimmed of a 1/4″ off of one side to give it a different shape. So far, I’ve made 4 out of the 5 I need, so keep an eye out for #5 coming soon! Here’s how mine turned out:

I went ahead and took a pic of the inside on two of them because there are two things that I do that are not in Tracy’s video. The first difference…though I do bind with the seam of the rings on the inside of the covers, so it’s not exposed, I also glue the rings down using Helmar 450 Quick Dry to make it easier to open and close. The ring is then attached to the base and the cover is free to move along it’s track w/o taking the rings with it.

The second difference…In Tracy’s video, she removed the backing on the post-it pad and glued the pad to the base. For mine, I also removed the backing, but I glued just the top 1/2″ (the part that has the removable adhesive already on it) to a piece of 3″ x 3″ cardstock which is the same size as the post it pad. I then added a strip of patterned paper to the base where it is only glued on the 2 side edges. Once dry, you can then slip the cardstock backing that you added to the post it pad under that strip to hold it neatly in place. Normally I would match the pattern so you can’t see where this strip is, but for one I used contrasting paper so you can easily see what I’ve done.

TFL!

Life – Helmar’s June Challenge

Helmar posted their first monthly challenge on their blog and I was really excited to see it! It’s a gorgeous sketch by DT member Lydell Quin! Well, I was a bit intimidated considering I wanted to make sure my project was Helmar-worthy for one, but also because when I think of Helmar’s fabulous adhesives, I think of Tracy Weinzapfel (who I didn’t find out until later that she’s the president of Helmar?!!) and when I think of Tracy, I think artsy artsy artsy! Pretty and artsy. Not exactly my comfort zone kinda stuff? Anyway, if you know Tracy, you know she’s a high-energy, you gotta try it, very inspirational, very motivational type of positive person, so I just HAD to do something that was outside of my norm.

When I looked at the sketch, I first thought of a photo of Christian I’ve been wanting to sketch, but the idea that formed wasn’t really do-able w/o being about the resize the photo, so I scratched that idea. Then I remembered that I’ve been wanting to scrap one of the last ultrasound photos of Christian…it was from a series that came out exceptionally clear and you could see his profile perfectly. The rest came to me immediately after, but I wasn’t sure if I’d be able to make it look the way I’d like. In order to create my layout, I had to flip and rotate the sketch. I replaced some of the floral details with Larry’s and my sketched hands, but still included a few close to the central image. I combined this challenge with one hosted by Becky (fellow DT member) on Sketches4All. Her challenge is to journal around your page and add one other technique she uses in the sample posted in the thread. Here’s what I came up with:

Here’s a close up of my sketching. I haven’t sketched a thing in years and have never taken a single class, so please excuse the amateur quality to it:

This is the fabulous Helmar sketch I got to work with:

This is how I flipped it to make it work for me:

Materials:

Lily Bee (Helmar Prefered Partner) This & That patterned paper (“pretty fabric”)
Core’dinations (Helmar Prefered Partner) G45 Core Impressions cardstock
American Crafts white cardstock
Prima flowers
Webster’s Pages Vintage Inspired Netting (original version)
Webster’s Pages Sparklers
Pink Paislee Cushies foam alphas
Pink Paislee (Helmar Prefered Partner) Artisan elements circle
Queen & Co. Rhinestones
Tattered Angels Shimmer mist (used to “paint” the bg paper, circle and alphas)
Distress Inks

Adhesives:

Helmar 450 Quick Dry
Helmar Gemstone Glue
Helmar Craft Glue

TFL!

Next Newer Entries