One Layout Two Ways

Okay, this is what happens when you try to combine too many challenges in a single project! I started with 2 sketches that I was torn between for the photos that I’d selected (it’s going to be a 2 page spread, and this is the first page of it). Then Nicolle came up with a great challenge on Sketches4All that required a black background and 2 different dry embossed papers. Okay…an image started to form in my mind, then Webster’s Pages offered a digi/hybrid challenge on InspireMe that requires the use of their digital brushes. At this point, I was still thinking that I could make this work.

I started with the PageMaps sketch since it was due first, and planned to add an embossed section on the left where you see the patterned paper in the sketch and at the bottom instead of the punched strip. I started fussy cutting some Webster’s Pages images and resized and printed the brushes I was planning to use. Then I remembered that it was supposed to have a black background for the S4All challenge. So then I added the G45 Core Impressions paper (which I love). Sanded the embossed areas to make them pop and placed the elements onto the paper.

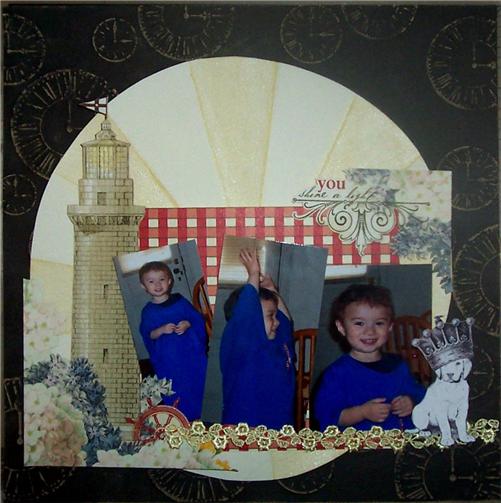
Hmm…doesn’t seem right to have it say You Shine a Light, when it’s so dark? So, using a plate, I traced a circle onto the “wrong side” of a sheet of white washed core’dinations that has yellow as the core color. Scored the “sun rays” to emboss it, sanded every other wedge to expose the yellow, then applied shimmer mist to the yellow sections to enhance them. Now it looked more appropriate for the pencillines sketch instead. So I switched gears and created a layout using the Pencillines sketch that met the criteria for Nicolle’s challenge….but then it wasn’t mainly Webster’s Pages products!

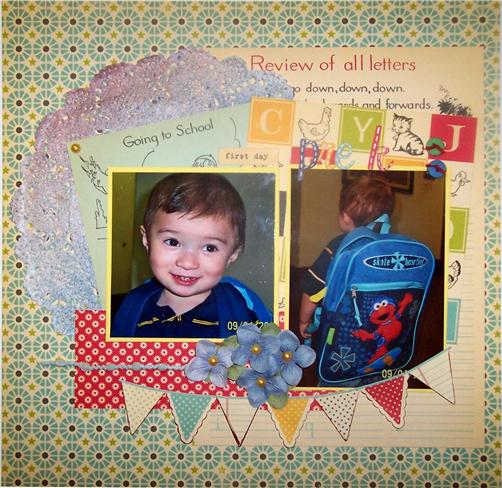
This first one is based on the Pencillines sketch:
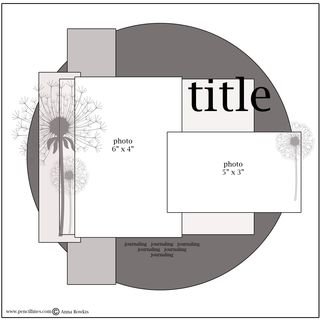
Here’s the sketch:

So, back to the drawing board. I took photos then took it apart and remade it using a white background that I masked and misted to create the same sunray affect and rearranged some of the elements according to the PageMaps sketch. Now the only non-WP item is the one white bg paper. I kept it with the white background since that’s what I’ll need in order to make the 2 pager I’d initially intended.

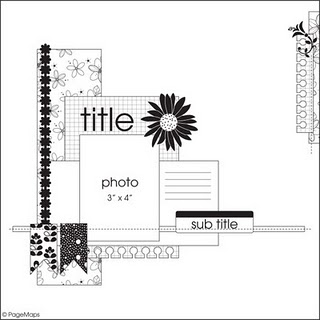
This is the layout based on the PageMaps sketch:

Here’s the PageMaps sketch:

TFL!

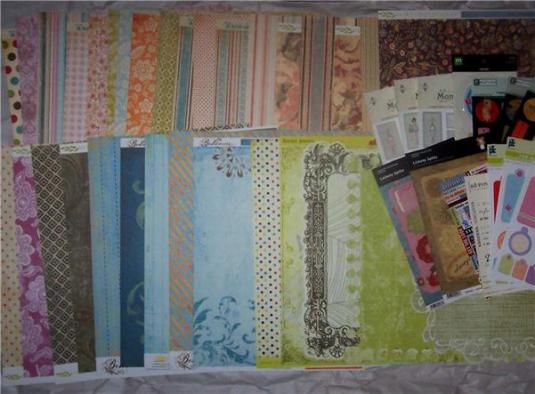
Materials (combined for the 2 projects):

Webster’s Pages Yacht Club 12×12 paper
WP trim
WP Ladies and Gents digi brushes
WP Ladies and Gents motifs
Core’dinations whitewash cardstock
Core’dinations G45 Core Impressions
American Crafts white cardstock
Shimmerz

Adhesives:

Helmar 450 Quick Dry
Glue Arts Glue Glider Pro Perma Tac

Advertisement

Fourth Photo For The Huge Giveaway

Sorry for the late post! Weekends are hectic around here and this one is no exception! Don’t forget to check back tomorrow for the last photo that shows what’s included in this enormous giveaway! For now, here’s the 4th photo:

Pictured here are some older MME’s Tres Jolie, Wild Asparagus and Bohemia papers, a pinch of Pink Paislee and a variety of stickers from various manufacturers. Stop back tomorrow for the fabulous finale which includes some Graphic 45, Imaginisce, Kaisercraft and more!

***Don’t forget to leave a comment so you don’t miss your chance to win! To enter to win, all you need to do is leave a comment on this post and/or any other posts I put up between the initial announcement post on April 25th and midnight (eastern) this Saturday, April 30, 2011. I will draw a random winner on Sunday, May 1, 2011. Please leave just one comment per post per day. If you become or already are a follower of my blog, you will receive an extra entry for each comment you make. Thanks everyone and good luck!***

I {Heart} Helmar

A couple of days ago, I received the most incredible news!!! Keeping my mouth shut about it was really, REALLY hard! Who am I kidding? I blabbed about it to my bff and a couple of others that I knew would not tell a soul. I couldn’t believe the email I received and had to read it a few times before it really sank in. Tracy from HELMAR, you know, the company that makes the most incredible crafting adhesives imaginable, contacted me and let me know that I was being the opportunity to be a Guest DT for their blog!!! I STILL can’t believe it, but sure enough the GDT list that was posted this morning has me on the list! {still giddy over the news!}

In case you are not familiar with Helmar’s products, here’s a pic that shows a lot, but not all, of what they make:

They make high quality, scrapbook-friendly adhesives that really do what you would want/expect an adhesive to do…STICK! Some of their products are incredibly innovative and I haven’t come across anything I could possibly replace them with. I have no idea how I ever crafted with my Helmar!

Some of my favorite products made by Helmar:

450 Quick Dry – This is a thicker, clear liquid adhesive that works fabulously on ribbons and trims. Handmade flowers are a snap with this wonder! It also works with just about anything! You can use it on acryllic, metal, wood, paper, chipboard, cardboard, canvas and the list goes on and on!

Premium Craft Glue – This fantastic, clear liquid glue is a lot like the 450 Quick Dry, but it isn’t as thick and takes a bit longer to dry. For ribbons and Trims, I prefer the 450, but for other applications, this is a more cost effective solution. Not recommended for acryllic

Liquid Scrap Dots – I can’t say enough about this amazing product!!! Have you ever had a fussy cut piece that you wanted to give dimension, but couldn’t because it was so intricate you wouldn’t be able to raise it with foam dots/tabs? Liquid Scrap Dots to the rescue! This stuff is amazing! It comes in a tube and you just apply as much as you need, where ever you need it and voila! Incredible levels of dimension! Want even more dimension? Apply a dab, let it dry and add another layer!!! You control the depth…get as much or as little lift as you want! Simply brilliant!

Acid Free Glue – White glue that dries clear. This is the one you want when you’re looking for a flexible hold that does not yellow. You can use it for book binding or even for decoupage!

V2 Vellum Adhesive – An incredible spray adhesive that is perfect for so much more than just vellum! Works great with acryllic, chipboard, cardboard and GLITTER too! On vellum, it simply vanishes…just imagine an adhesive where your vellum doesn’t ripple and you don’t need to try to hide where you’ve applied it, because it doesn’t show through! Works like a dream! Just think of the magic you could create with an adhesive like this…you could even use it to apply vellum to acryllic with no need to hide either side!!! What other adhesive gives you this kind of versatility?

Helmar also makes an adhesive runner, gemstone glue, fabric glue, 2 step crackle medium and Zap Dots (these are like foam dots for dimension and are available in clear, white and black and in various sizes). Be sure to check some of these products out today! If your LSS does not carry them, there are many fabulous online retailers now carry a wide variety of their products. Twopeasinabucket.com now carries Helmar as well as Scrap-tastic.com They also have a link on their site for other retailers. You can even find Helmar on facebook!

***Be sure to check out my fabulous giveaway on the previous post***

First Day PreK layout – The Paper Variety challenge entry

For this layout, I combined 3 challenges. I used the sketch provided by The Paper Variety for their weekly challenge, a manufacturer challenge on Paper Secrets and a number challenge on Sketches for All (1 ribbon, 2 buttons, 3 patterned papers, 4 flowers, 5 of any bling…I went with pearls). Here’s what I came up with:

TFL!

Materials:

October Afternoon Schoolhouse papers
Paper doily
OA diecut stickers
OA diecut alphas
American Crafts solid cardstock
Prima flowers
Bo Bunny buttons
DMC embroidery floss
My Mind’s Eye Lost and Found Trim
Kaisercraft pearls
Tattered Angels shimmer mists
Martha Stewart marker
Inkssentials white pen

Adhesives:

Glue Arts Glue Glider Pro PermaTac
Helmar 450 quick dry
Scotch Quick Dry Liquid

The sketch I used for this layout:

If you would like to use this sketch to create your own layout and enter The Paper Variety’s challenge (entries must be submitted by March 22, 2011 noon est), CLICK HERE.

To join the fun challenges on Paper Secrets, CLICK HERE.

To check out the challenges on Sketches 4 All, CLICK HERE.

Previous Older Entries