Riding with Barney Layout and a Birthday Card for Paper Secrets

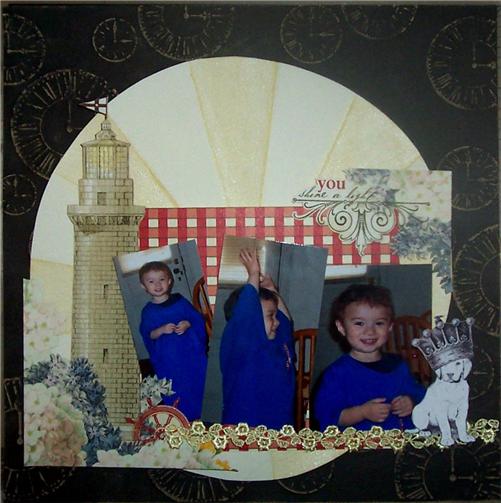
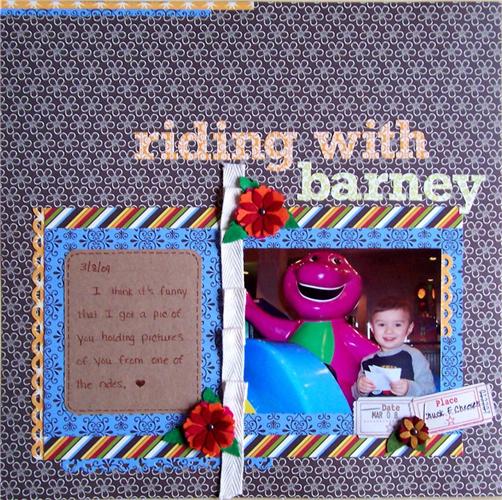
The challenges at Paper Secrets are so much fun that I like to play along when I can too. Aside from my dt work for the monthly challenges, there are 2 progressive weekly challenges with which I now play along. One is SYAO2 (short for scrap your ass off…round 2) and the other is CYAO. Sign ups are closed for SYAO, but there’s still a little bit of time for progressive card challenge. If you’re not familiar with what a progressive challenge is, it’s one where everyone signs up to start at the same time and there’s a deadline for the first challenge, anyone who does not complete the challenge by the deadline or does not meet the requirements for the challenge, is disqualified and everyone else moves on to the next round. This continues until there is only 1 participant still scrapping. 😀 Since the first SYAO is still going strong (I think there are still 7 members in it to win it) and they’re on week #40, Kristi was nice enough to start a new round last week for all of us who have been waiting for a chance to play. 😀 For each week’s sketch there is a list of materials, of which participants need to select 4 out of the 8 items to use on their layout and also a list of techniques and we must use 1 out of the 3 listed. For my take on week #2’s sketch for SYAO2, I used ribbon, 3+ flowers, 3+ brads, staples and a border punch. For the technique I selected stamping. Here’s my take on the challenge:

Materials:
Jillibean Soup Minestrone Soup pp
Jillibean Soup felt flowers
Jillibean Soup brads
Jillibean Soup alpha stickers
trim from my stash
kraft paper
Jenni Bowlin tickets
Smash date stamper
Fiskars punch

Adhesives:

Helmar Premium Craft Glue
Helmar Quick Fix Adhesive Runner
Helmar 450 Quick Dry

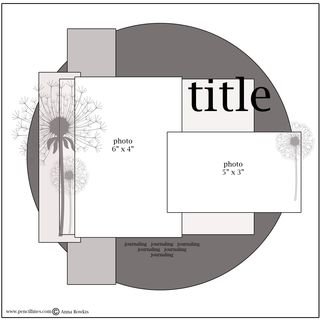
The fab Pagemaps sketch that was selected for this challenge:

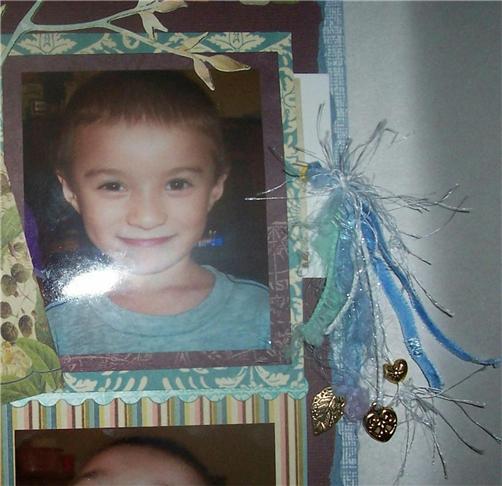
Next I have my card for week #1 of CYAO. For my stash items, I selected Core’dinations cardstock (2 different kinds), stamp and ink for my sentiment, a flower and sanding. Here’s my take on the challenge:

Materials:

Core’dinations chocolate box cardstock
Core’dinations Core Impressions Jenni Bowlin 6×6 cardstock
TPC Studio stamp
Archival Ink
Twill trim from my stash
Prima Flower
Ranger Sanding Block
EK Success Punch

Adhesives:

Helmar Premium Craft Glue
Helmar 450 Quick Dry

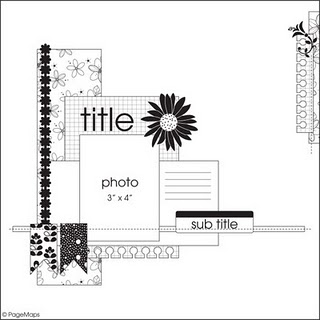
The awesome pagemaps sketch we worked with:

TFL!

Advertisement

One Layout Two Ways

Okay, this is what happens when you try to combine too many challenges in a single project! I started with 2 sketches that I was torn between for the photos that I’d selected (it’s going to be a 2 page spread, and this is the first page of it). Then Nicolle came up with a great challenge on Sketches4All that required a black background and 2 different dry embossed papers. Okay…an image started to form in my mind, then Webster’s Pages offered a digi/hybrid challenge on InspireMe that requires the use of their digital brushes. At this point, I was still thinking that I could make this work.

I started with the PageMaps sketch since it was due first, and planned to add an embossed section on the left where you see the patterned paper in the sketch and at the bottom instead of the punched strip. I started fussy cutting some Webster’s Pages images and resized and printed the brushes I was planning to use. Then I remembered that it was supposed to have a black background for the S4All challenge. So then I added the G45 Core Impressions paper (which I love). Sanded the embossed areas to make them pop and placed the elements onto the paper.

Hmm…doesn’t seem right to have it say You Shine a Light, when it’s so dark? So, using a plate, I traced a circle onto the “wrong side” of a sheet of white washed core’dinations that has yellow as the core color. Scored the “sun rays” to emboss it, sanded every other wedge to expose the yellow, then applied shimmer mist to the yellow sections to enhance them. Now it looked more appropriate for the pencillines sketch instead. So I switched gears and created a layout using the Pencillines sketch that met the criteria for Nicolle’s challenge….but then it wasn’t mainly Webster’s Pages products!

This first one is based on the Pencillines sketch:

Here’s the sketch:

So, back to the drawing board. I took photos then took it apart and remade it using a white background that I masked and misted to create the same sunray affect and rearranged some of the elements according to the PageMaps sketch. Now the only non-WP item is the one white bg paper. I kept it with the white background since that’s what I’ll need in order to make the 2 pager I’d initially intended.

This is the layout based on the PageMaps sketch:

Here’s the PageMaps sketch:

TFL!

Materials (combined for the 2 projects):

Webster’s Pages Yacht Club 12×12 paper
WP trim
WP Ladies and Gents digi brushes
WP Ladies and Gents motifs
Core’dinations whitewash cardstock
Core’dinations G45 Core Impressions
American Crafts white cardstock
Shimmerz

Adhesives:

Helmar 450 Quick Dry
Glue Arts Glue Glider Pro Perma Tac

Easter Wishes Card – Cardabilities challenge entry

It’s been a while since I last entered a Cardabilities challenge, so I popped in to see what they had posted. I found a really cute sketch for this week’s challenge with gears on it. Well, with Easter quickly approaching, I decided to take the sketch a different direction and pieced together a couple of stamped images instead. I also went with a core’dinations whitewash base so I could add detail to the background by sanding it rather than going with a ribbon since I was popping parts of the image up with foam dots. Here’s what I came up with:

Materials:

American Crafts white cardstock
Core’dinations whitewash
Echo Park For the Record papers
Archival Ink

Adhesives:

Glue Arts Glue Glider Pro Perma Tac
American Crafts foam dots

Tools:

Studio G clear stamps

TFL!

If you’d like to take a look at the sketch I used for this card or if you’d like to enter a Cardabilities challenge, CLICK HERE.

Webster’s Pages – Scrapbook Paper and Embellishments

I’m pretty new to the world of scrapbooking, but I’ve done a lot of “shopping around.” I’ve discovered a lot of brands that I adore and will eventually get around to sharing them all with you, but I’d like to start with my absolute favorite! Webster’s Pages (www.websterspages.com) has papers, diecut pages, embellishments, trim, journaling cards, etc. that is to die for! Gorgeous, detailed, high quality products. Here are some pics of the layout I created using some of their fantastic papers, stickers and a journaling card.

This layout was created using core’dinations cardstock (the background paper), Webster’s pages 6″ x 6 ” paper for all of the photo mats and frames, Webster’s Pages stickers (the tree, branches and leaves, and butterflies) and journaling card (bottom left corner), Cloud9 rub-ons and Prima flowers.

Here’s a closeup of where I’ve tucked a hidden tag (with a private message for my son) which I matted with Webster’s Pages paper and tied with assorted fibers and charms.

This layout was my entry in the Webster’s Pages September Challenge. I was very impressed with the quality of the papers and how durable their journaling cards are. I adore their lovely designs and vintage look. I just wish I’d had more of their products to work with! I do feel, however, that my layout shows how nicely the Webster’s Pages products coordinate with anything you’ve got on hand. Their products would make a wonderful addition to anyone’s crafting supplies