Summer ATCs and Coffee Themed Pocket Letter

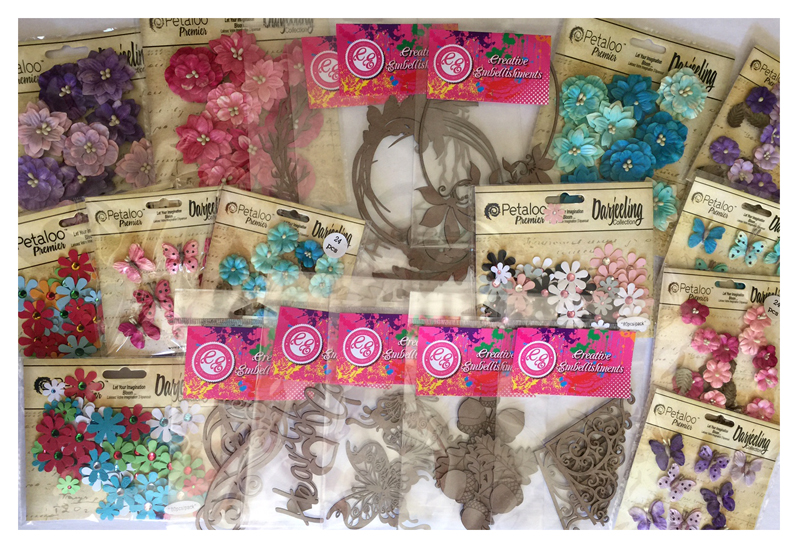
As we say goodbye to summer and usher in the new season with its cooler weather, I decided to share two separate projects I created recently using some fabulous products by Creative Embellishments. 😀 First up, I created a four ATC set for a trade partner I met through a facebook group. Since all 4 were for a single recipient, I made them all similar, yet different. For the base, I distressed and layered papers that I’d stamped with the CE Distressed Text Stamp and splattered with black India ink, then swiped a bit of gesso onto corrugated cardboard. I topped each cardboard piece with some wood veneer pieces from the CE Summer,  Anchor, or Boat Wheel sets. I finished them with a bit of tied twine around each piece. Here’s how they turned out:


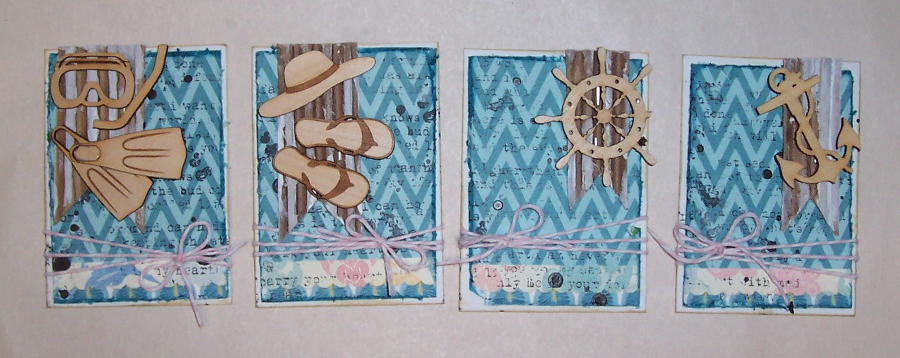
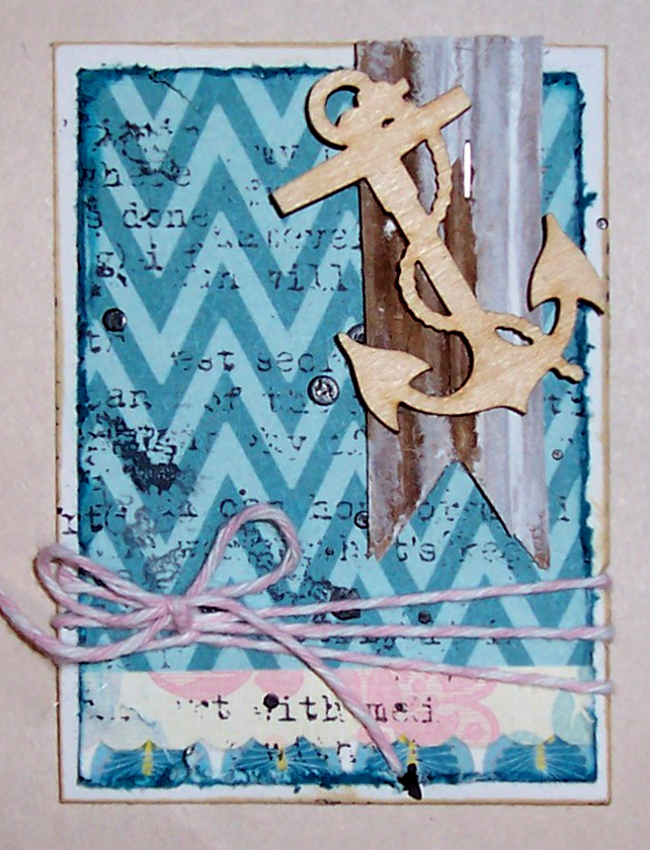
Close ups of the individual cards:


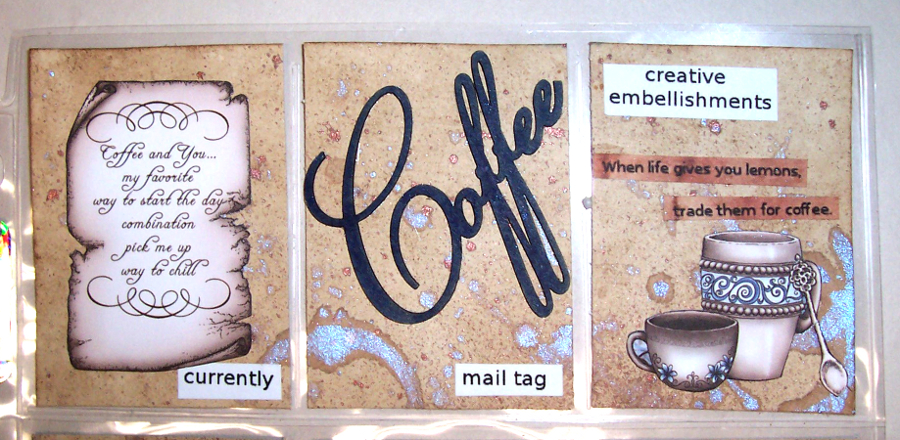
Next, I created a coffee themed pocket letter. For the base, I dyed the white cardstock background paper with real coffee grounds, then splattered it with a Lindy’s Stamp Gang color shot and Tattered Angels glimmer mist used the same color shot to add “cup rings” to the page. I then added fussy cut images from a Heartfelt Creations paper pad. I then added my CE Coffee set pieces which include the title (altered using acrylic paint), the layered CE “to go” cup (altered with with gesso and acrylic paint), and the cup and saucer (altered with PITT artist markers). I left the wood veneer Coffee Cup piece bare. Here’s how my pocket letter turned out:


Close ups of each row:


TFL! I hope you enjoyed my projects! If you haven’t already, be sure to check out our September Challenge post for info on how to enter for a chance to win the $50 gc prize!

Advertisement

Creative Embellishments and Petaloo Product Swap Blog Hop

I’m up on the Creative Embellishments’ Blog toay, sharing a project I created for the cross promotion we’re having with Petaloo! I’m thrilled that I got to participate in this awesome product swap/blog hop between two amazing companies! Creative Embellishments’ fabulous laser cut chipboard, rubber stamps, etc. work beautifully with Petaloo products! Both are so much fun to create with! For the team up, we were asked to create a Mother’s Day themed project. For mine, I went in a different direction. Rather than something to gift to my mother or mil, I decided to create something for one of my children (now I’ll also have to create something for each of the others! LOL). Without my little ones, I would not get to be a mother and I’m thankful for this incredible honor. I do understand and appreciate the fact that not everyone who wants to have children are able to for various reasons, so I’m grateful to have each of them in my life. They’re so unique and talented in their own special ways and I love their similarities as well was their differences…even when they’re driving me nuts. LOL  Here’s what I came up with:

For this canvas, I used the CE Grunge Music Note Sheet Stamp with glossy medium to create a resist for the background. I then used Lindy’s Stamp Gang, Tattered Angels, and Maya Road Mists to add color to the background, then finished by using the CE Distressed Text Stamp and Distressed Corner Stamp with Staz-on ink to add more texture and visual layers. I altered the Leafy Corner Flourish Set, “Mother” from the Holiday Sentiment Word Set, and Scribble Heart by coating them first with white gesso, then applying Distress stains and paints. To decorate the Julie Nutting stamp by Prima, I stamped, fussy cut, then paper pieced from plain and patterned paper, added a bit of Webster’s Pages trim, colored her hair using PITT markers, and added shading to the doll and dress with distress inks. These are gorgeous Petaloo produts I got to work with from their Darjeeling collection: Dahlias (package of 10)- Teastained Purple, Dahlias – Teastained Teals, Garden Rosette (package of 6 plus 6 leaves) – Pink, Petites (package of 12 plus 12 leaves)- Teastained Purple, Petites – Teastained Teals, Petites – Teastained Pink, and Mini Butterflies (package of 8)- Teastained Purple. I loved that the Rosettes and packets of Petites came with leaves to go with them!

Some close ups:

I hope you liked my project!

***Thanks for stopping by! Be sure to check out both the Creative Embellishments Blog AND the Petaloo Blog for some fabulous inspiration from both design teams, combining their products! Leave a comment each day of the hop (April 3rd – 9th) for your chance to with either a $30 gc to the CE store, or an awesome prize pack filled with CE and Petaloo products! 😀 ***

Driven to Learn – Mixed Media Canvas for Creative Embellishments

Since my youngest 3 children attend cyber school, we were able to have 3 of the children in a single school photo. 😀 For this piece, I fussy cut to remove the background, then set the pic aside until the end of my project. I started out by adhering my first layer of chippies and coating everything with gesso. As that was drying, I lightly coated the other layered pieces with gesso as well. I then started with the darkest shade of blue mist used and sprayed the border of the canvas board. After adding the Steampunk Corner pieces, I misted again using the same color around the outside edges. I then added the next layer of pieces which included the Mini Hot Air Balloon, Steampunk Light Bulb, Steampunk Pipe Corner, Pocket Watch, and Music Borders and sprayed the whole project with a lighter shade of blue. After that dried, I went over splattered the project with white distress ink and black india ink. Next, I went over some of the edges with black ink to give the layers a little more contrast. I then tucked my photo under the layers and added the eagle piece that I misted with the lightest shade of blue. Last, I added the bare chipboard pieces. Sorry my pics aren’t very clear. Between the glossy photo and the shimmer from the mists, I kept getting a glare, but the pics are blurry without a flash. I’ll try to replace the photos once I can get some daylight. 🙂


driven to learn 2

driven to learn close up 1

driven to learn close up 2

driven to learn 1


CE products used on this project:

6×6 Mini Brick Panel

Large Clock Face 5″

Steampunk Corner Set

Steampunk Pipe Corner

Steampunk Pocket Watches

Mini Steampunk Hot Air Balloon

Steampunk Light Bulbs

Globes 6″

Music Borders

Eagles

Chalkboard Frame Set

Gear Set 2 Medium

Journey Word Set

Way To Go

Adventure Word Set

Dream On – dt layout for Creative Embellishments

Happy Thursday, everyone! I’m up on the Creative Embellishments blog with a layout of my youngest son. This photo was taken a couple of years ago, the one and ONLY time he ever fell asleep unintentionally. lol Christian is not only a night owl, but he takes after me in other ways too. He doesn’t tend to just fall asleep randomly like other babies and toddlers do. He snuggles with his blanket, lays down, closes his eyes and knows he’s falling asleep…all but this once that I’m aware of. One minute he was sitting up and jabbering away and the next, he was slumped over and asleep. Just.like.that. lol

To create my page, I used several Creative Embellishments stamps on the background and layering some CE chippies with papers and metal pieces that I intentionally rusted. To alter the title, circles and panel, I just applied acrylic paint. For the view master slide, I then inked over it with distress ink. The frond I gessoed, then used distress stain, allowing it to puddle unevenly on the piece and air dry.

I was also inspired by sketch #111 from Sketchabilities. 😀

Dream On

The fabulous sketch I worked with:

sketchabilities #111

Materials:

Creative Embellishments Distressed Text stamp
CE Distressed Chicken Wire stamp
CE View Master Photo slide
CE Frond Set 2
CE Rings for So Many Things
CE 6×6 Mesh Panel
CE Dream On title piece
Tim Holtz papers, distress ink, distress stain
acrylic paint
gesso
india ink
Tattered Angels glimmer mist
dry wall tape
iron filings
metal flowers and butterfly

TFL!

Previous Older Entries