Driven to Learn – Mixed Media Canvas for Creative Embellishments

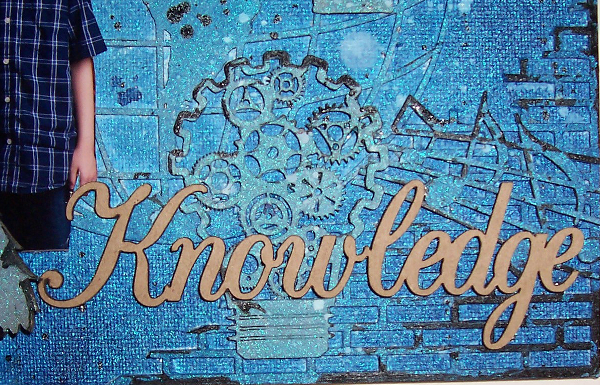
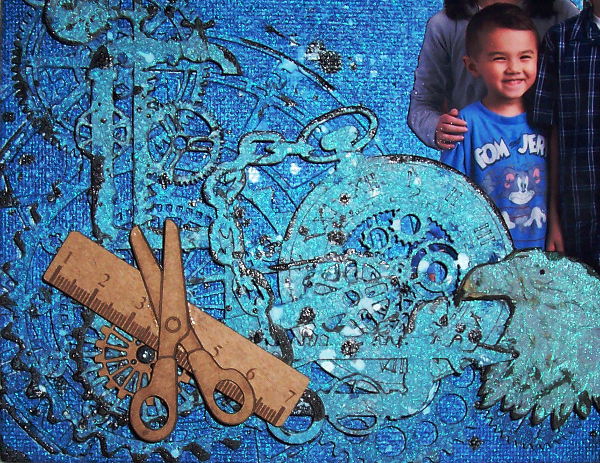
Since my youngest 3 children attend cyber school, we were able to have 3 of the children in a single school photo. 😀 For this piece, I fussy cut to remove the background, then set the pic aside until the end of my project. I started out by adhering my first layer of chippies and coating everything with gesso. As that was drying, I lightly coated the other layered pieces with gesso as well. I then started with the darkest shade of blue mist used and sprayed the border of the canvas board. After adding the Steampunk Corner pieces, I misted again using the same color around the outside edges. I then added the next layer of pieces which included the Mini Hot Air Balloon, Steampunk Light Bulb, Steampunk Pipe Corner, Pocket Watch, and Music Borders and sprayed the whole project with a lighter shade of blue. After that dried, I went over splattered the project with white distress ink and black india ink. Next, I went over some of the edges with black ink to give the layers a little more contrast. I then tucked my photo under the layers and added the eagle piece that I misted with the lightest shade of blue. Last, I added the bare chipboard pieces. Sorry my pics aren’t very clear. Between the glossy photo and the shimmer from the mists, I kept getting a glare, but the pics are blurry without a flash. I’ll try to replace the photos once I can get some daylight. 🙂


driven to learn 2

driven to learn close up 1

driven to learn close up 2

driven to learn 1


CE products used on this project:

6×6 Mini Brick Panel

Large Clock Face 5″

Steampunk Corner Set

Steampunk Pipe Corner

Steampunk Pocket Watches

Mini Steampunk Hot Air Balloon

Steampunk Light Bulbs

Globes 6″

Music Borders

Eagles

Chalkboard Frame Set

Gear Set 2 Medium

Journey Word Set

Way To Go

Adventure Word Set

Valentine’s Treat Bag – Creative Embellishments

Valentine’s Day is nearly upon us and this year, I figured I would hand make some treat bags for the kiddos and make each of them unique. The one I’m sharing today was created for my daughter, Madison, using Prima papers, I am Roses flowers, and of course my favorite Creative Embellishments laser cut chipboard pieces and veneers! 😀 To create the base, I took a 12 x 12 sheet of card stock and scored the left and right 2.5″ in from the sides. I then rotated the paper 90 degrees and scored it at 5″ and 7″. I then folded it to create the center pocket and glued them in place. From there, it’s the fun part…embellishing! 😀 Since the paper I selected was kind of vintage looking, with muted colors, I decided to leave the chippies and wood pieces bare to lend it an earthy appeal. I hope you (and my daughter) like how it turned out!

valentines bag

This pics shows the side a bit:

valentines bag side

Close up of the cluster with the wood veneer pieces:

valentine bag close up 1

Close to show the dimension:

valentine bag close up 2

The awesome CE products I got to use (click the pic to be taken to their listings in the store)…

fancy scalloped lace-800x800doily-frame-296-600x600conversation-hearts-399-600x600

Valentine’s Tags – Creative Embellishments

I love the versatility of Creative Embellishments 6×6 panels! For my two tags, I used the chipboard panels as a mask for the background with a Tattered Angels mist and can still use the pieces on future projects! You can even use them as stencils with modeling paste or textured mediums to create a background with texture and dimension! For these tags, I stamped the backgrounds for added details once the mist dried. All my chipboard pieces were altered with acrylic paints. I stamped over the window to give it a bit of added interest. For the wood veneer hearts, I first applied black india ink with a brush, the brayered over the raised details with acrylic paint to make the texture pop. 😀 The tag on the right was inspired by a journal cover created by Gabrielle Pollacco.

The two tags:

both tags


Close ups of the background details:

tag close up 2

tag close up 3


Close ups of the layered pieces:

tag close up 1

tag close up 4


The CE products used on the 2 tags:

mini-quatrefoil-panel-642-600x600full-of-heart-panel-446-600x600distressed-crackle-stamp-637-600x600grunge-music-note-sheet-stamp-409-600x600long-stem-roses-450-600x600hearts-167-600x600valentine-s-hashtags-515-600x600arched-windows-set-of-2-433-600x600branches-set-of-3-862-600x600


Peace – Mixed Media Canvas

Simplicity is the name of the game around my house these days. With school back in session and new undertakings, it’s easy to get overwhelmed, so my project for today’s post on the Creative Embellishments Blog is an easy to create/recreate, mixed media canvas that I find very soothing. It was inspired by this month’s challenge image as well. 😀 It reminds me of quiet, winter nights and softly drifting flakes, so I used 2 lines from the poem, “Stopping by Woods on a Snowy Evening” by Robert Frost.

I started off by masking off sections of the canvas with dry wall tape. I then used a palette knife to apply modeling paste in sections. I let it set for a few minutes, then removed the dry wall tape, which then leaves the grid texture behind. Once that was dry, I spritzed the entire canvas using several shades of Tattered Angels shimmer mist and Lindy’s Stamp Gang Starbursts, applying the lightest shades to the center and the darkest towards the edges. To blend the colors so there wouldn’t be spray shaped splotches of color, I went over the whole piece with a spray bottle of plain water. I then blotted up the excess moisture with a paper towel, and dried it with my heat gun.

I used Versa Mark ink and Lindy’s Stamp Gang EP with my CE Snowflakes stamp to add some more background details. I like to cut apart larger chippies to use on different parts of a project, which is what I did for this one. I altered my chippies by coating the Snowflake Page Corner pieces with gesso, and heat embossing the title piece. I finished it off with a bit of bling. I hope you like how it turned out!

peace


Close up of one of the altered chippies:

Peace close up 1


Close up of the background details:

peace close up 2

peace close up 3


The CE products used for this project:

snowflake corners-600x600love-joy-peace-327-600x600snowflakes-stamp-414-600x600

Previous Older Entries Next Newer Entries