Dream of a Love Canvas

My project today was inspired by a quote from the book Practical Magic by Alice Hoffman (the quote is also in the movie). It’s part of a letter that one of the character writes and the portion I added to my project says, “Sometimes, when the wind is warm or the crickets sing…I dream of a love that even time will lie down and be still for.” It’s one of those lines that really sticks with you, even years after reading or hearing it. 😀 I am still trying to learn how to take pics of projects that are shimmery, so please excuse the poor quality of my photos. In real life, the colors are closer to the cell phone photo. I started out by applying crackle medium and then added the clock pieces and gears. Once that set, I applied a light coating of gesso onto the chippies and colored with acrylic paint. Then applied coarse pumice mixed with acrylic paint, bronze paint, and glass beads colored with Lindy’s Stamp Gang Magicals. I altered the heart piece the same way and applied that last. Here’s how it turned out…

freeze time 2


pic taken with my cellphone to try to get closer to the real colors:


freeze time 1


Close up of the quote and top right cluster:


freeze time close up 1


Close up of the steampunk heart:


freeze time close up 2


Thanks for looking!

CE products used on my project:

steampunk-heart-66-600x600large clock 1-600x600gear-set-2-small-713-600x600gear-set-2-medium-712-600x600gear-set-2-large-711-600x600


Advertisement

Best Friends – Canvas

Creative embellishments chippies are so much fun to work with and so versatile! For this canvas, I simply applied a light gesso, then heat embossed to give them a wonderfully enameled look that makes the stand out from my project. As it happens, CE’s founder and head designer, Nicolle, is my best friend. She’s a true inspiration. Hardworking (did you know CE is family owned and operated? They do everything from design the pieces, cut them, weed them, package and sticker them, and ship them!), creative, uplifting, supportive, and more! I cannot imagine my life without her. I’m so blessed to have met her. ❤ So, my project is dedicated to my bestie, Nicolle. 😀

I started out by painting the canvas board with black gesso, then used white gesso and stencils for the corner work. I then used modeling paste with 2 other stencils for the other details (though much of it was covered by the flowers). Once that dried, I used Lindy’s Stamp Gang color shots on the white gesso . I used a heat gun to dry the links between colors. Next, I adhered the clock pieces in 2 different sizes, on either end of my project. I then clustered and layered the flowers, skeleton leaves, and leaves across my project. Last, I added the sentiment, heart piece, and title piece, which I cut in half to better fit my project. That’s another thing I love about all the CE pieces. Though thick and durable to withstand all your favorite wet mediums, they’re also easy to cut to suit your needs. 😀 Here’s how my project turned out:

BF full


Close ups:

bff close up 1


bff close up 2


bff close 3


bff close up 4


bff close up 5


CE products used on this project:

Capturebf border word-800x800large clock 1-600x600large clock 1-600x600

Encouragement/Incentive Board

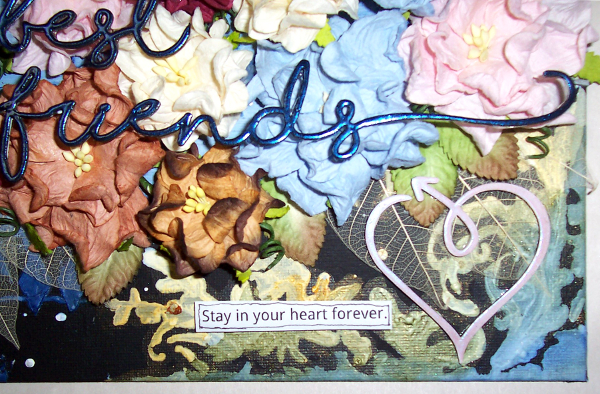
I’m up on the Creative Embellishments Blog today, sharing a project I created to hopefully motivate my children to do their chores! Getting them to help around the house or complete a single chore each has been nearly impossible, so I decided to create an encouragement/incentive board. Each day, they will find their tag on their dresser to remind them to get their single chore done. Once completed, they can add their tag to the their clip under the board. Then each night, I can give them a marble for completing their task and return the tag to their dressers. They can then save up their marbles for a prize that’s redeemable once they’ve collected 10 marbles. 🙂

The start out, I took an 8×10 canvas board and coated it with a spray adhesive and layered 2 different laces over it, covering it completely to create the background texture. I secured the excess material around the back. I then coated the whole surface with gesso. As that was drying, I cut a piece of cardstock for the back. Its purpose is to hold the 3 clips at the bottom of the canvas board so the tags can slip into place. I just attached the paperclips to the cardstock using 3 larger brads. Then glued the cardstock to the back of my project. It also gives the back a nice smooth finished look rather than having loose material ends showing there. 🙂

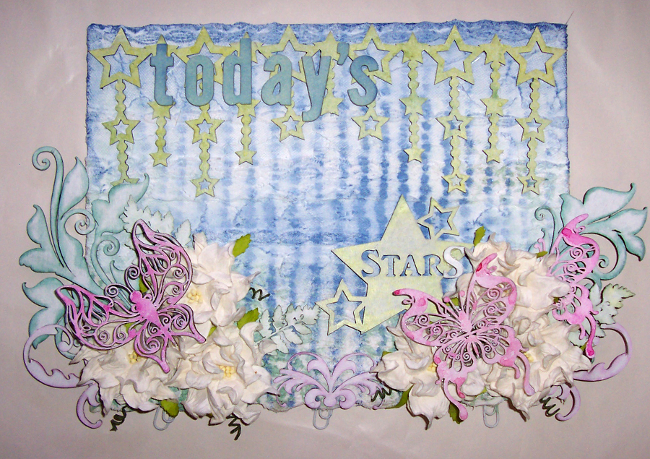
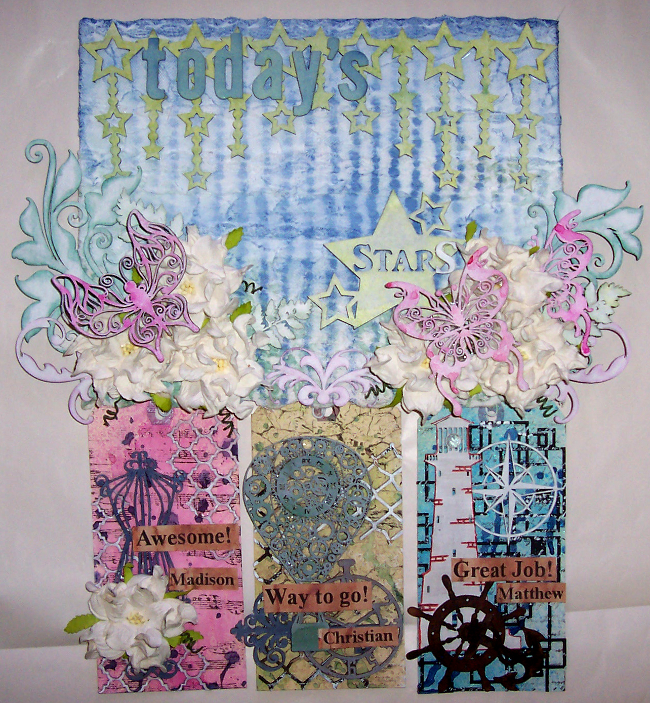
I then used 2 masks and misted the background for the main piece. To alter my chippies, I used Lindy’s Stamp Gang mists on the Falling Star Border piece and the Star title piece, along with the butterflies. I tried to create more dimension and detail by edging the flourishes and fern pieces with Pan Pastels. Here’s how it turned out:

encourage canvas

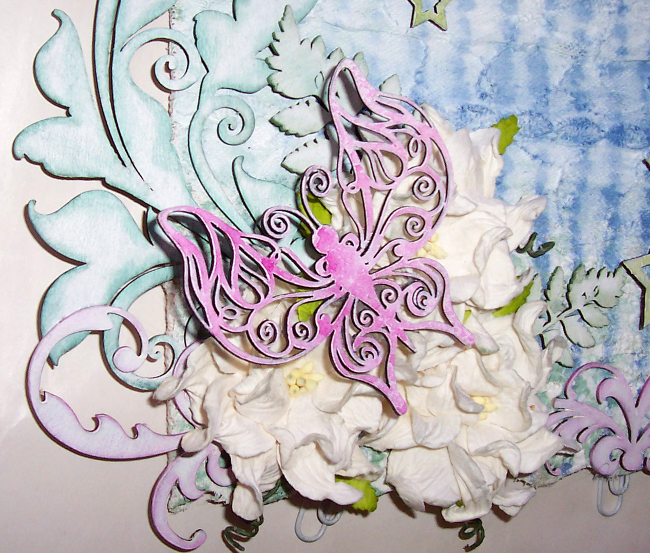
Close up of the left cluster:

encourage close up 1

Close up of the right cluster:

encourage close up 2

I then created the 3 tags simultaneously. One for each of my 3 youngest children. I started out by lightly gessoing each tag. I then selected 3 shades of Lindy’s mist for each tag. I misted with the 2 lightest shades, then splattered with the 3rd, applying the heat gun after each layer. When splattering, to create drippies, I just hold the tag upright after sprinkling it with color and tap it on a solid, protected surface to encourage the droplets to move down my project, then use the heat gun to set it. Once dry, I then stamped each tag with a different CE background stamp. I love how fun and versatile they are! There are quite a few that are a staple in my craft room. 😀

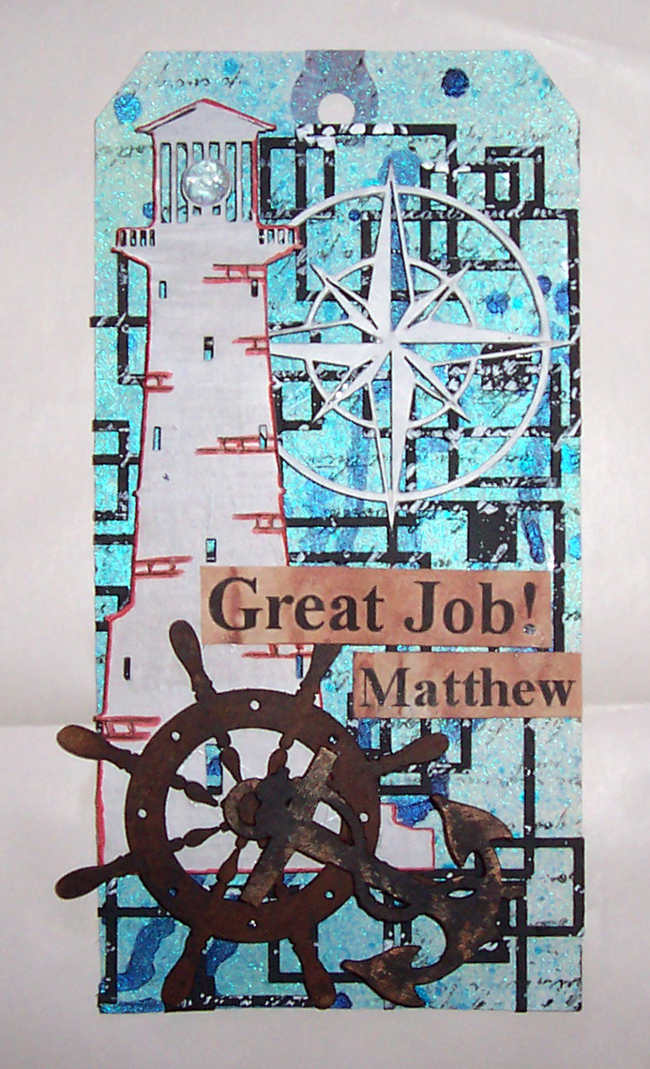
I then selected a different panel piece for 2 of the tags and a Chicken Wire Border pieces that I pieced together for the 3rd, and snipped off the pieces I wanted to use. I love using just bits and pieces of the panels on different projects. They’re a great way to add interest and dimension and 1 piece can be used on several projects when you cut them apart on primarily use on visible areas of your project. 🙂 For Madison’s and Christian’s tags, I had left a good bit of the base showing through gaps in the panel so you could still see those details, but on Matthew’s I’d opted to cover the bulk of it with the  Retro Square Panel. So after I painted each of the panel pieces, I stamped again on top of the panel piece on Matthew’s tag, mirroring the background stamping. I selected CE chippies that go with their personalities and interests and incorporated them into their tags, keeping their favorite colors in mind. For Christian’s and Madison’s tags, I misted the pieces. For Matthew’s I used acrylic paints and PITT markers. Here’s how they turned out:

encourage all tags

Close up of Madison’s tag:

encourage madison

Close up of Christian’s tag:

encourage christian

Close up of Matthew’s tag:

encourage matthew

Here’s how it all looks assembled:

encourage assembled

I’m really hoping that them wanting to have their tag on display like this will encourage them to get their chores done early (without being reminded), rather than waiting until bedtime. 😀 Wish me luck!!!


CE products used:

For the canvas:

Falling Stars Border

Star Student title piece

Flourish Set 4

Flourish Set 20

Flourish Set 21

Flourish Butterfly Set 2

Flourish Butterflies Set 3

Fern Foliage 5


For Madison’s Tag:

Grunge Music Note Sheet Stamp

Dress Form Set of 3


For Christian’s Tag:

Distressed Crackle Stamp

Distressed Chicken Wire Border

Keys

Mini Pocket Watches

Mini Steampunk Hot Air Balloon


Matthew’s Tag:

Distressed Script Stamp

Retro Square Panel

Nautical 6 piece set


Peace – Mixed Media Canvas

Simplicity is the name of the game around my house these days. With school back in session and new undertakings, it’s easy to get overwhelmed, so my project for today’s post on the Creative Embellishments Blog is an easy to create/recreate, mixed media canvas that I find very soothing. It was inspired by this month’s challenge image as well. 😀 It reminds me of quiet, winter nights and softly drifting flakes, so I used 2 lines from the poem, “Stopping by Woods on a Snowy Evening” by Robert Frost.

I started off by masking off sections of the canvas with dry wall tape. I then used a palette knife to apply modeling paste in sections. I let it set for a few minutes, then removed the dry wall tape, which then leaves the grid texture behind. Once that was dry, I spritzed the entire canvas using several shades of Tattered Angels shimmer mist and Lindy’s Stamp Gang Starbursts, applying the lightest shades to the center and the darkest towards the edges. To blend the colors so there wouldn’t be spray shaped splotches of color, I went over the whole piece with a spray bottle of plain water. I then blotted up the excess moisture with a paper towel, and dried it with my heat gun.

I used Versa Mark ink and Lindy’s Stamp Gang EP with my CE Snowflakes stamp to add some more background details. I like to cut apart larger chippies to use on different parts of a project, which is what I did for this one. I altered my chippies by coating the Snowflake Page Corner pieces with gesso, and heat embossing the title piece. I finished it off with a bit of bling. I hope you like how it turned out!

peace


Close up of one of the altered chippies:

Peace close up 1


Close up of the background details:

peace close up 2

peace close up 3


The CE products used for this project:

snowflake corners-600x600love-joy-peace-327-600x600snowflakes-stamp-414-600x600

Previous Older Entries