Valentine’s Tags – Creative Embellishments

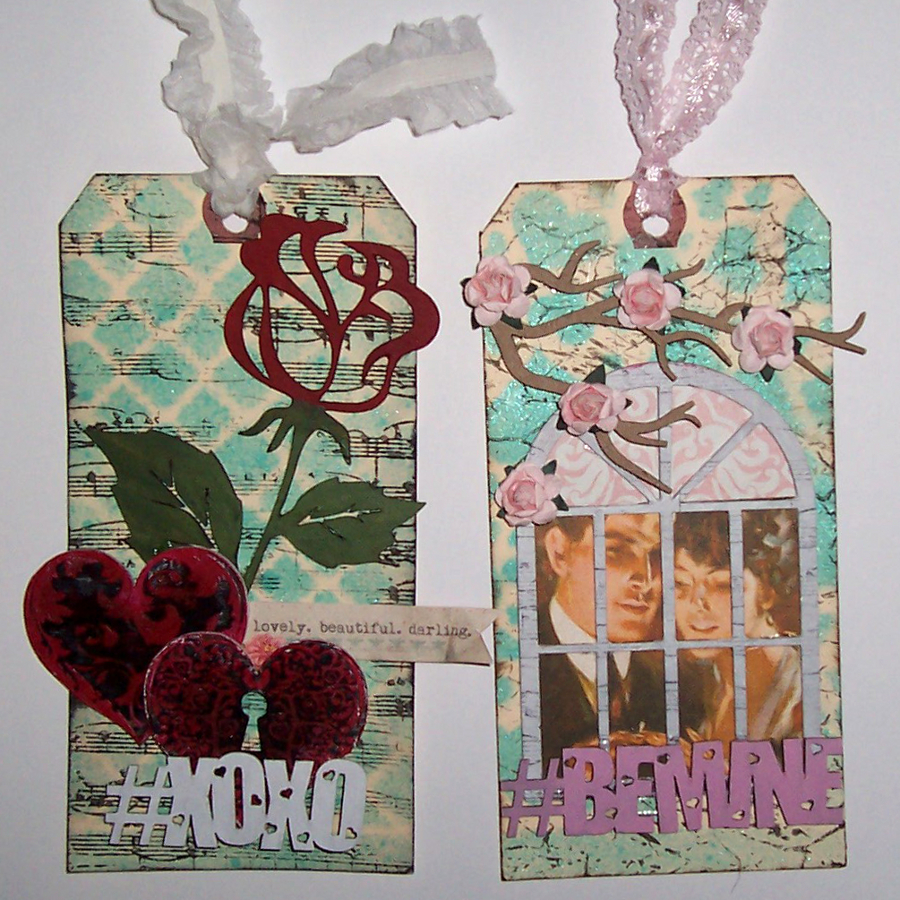
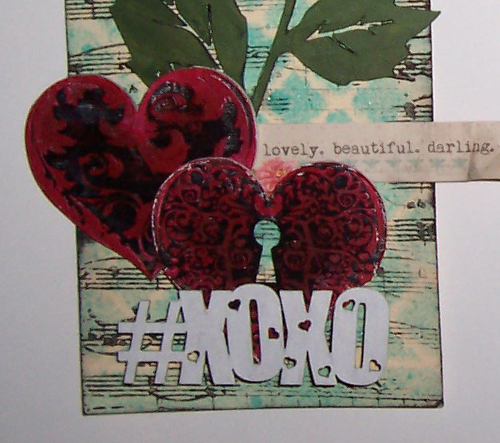
I love the versatility of Creative Embellishments 6×6 panels! For my two tags, I used the chipboard panels as a mask for the background with a Tattered Angels mist and can still use the pieces on future projects! You can even use them as stencils with modeling paste or textured mediums to create a background with texture and dimension! For these tags, I stamped the backgrounds for added details once the mist dried. All my chipboard pieces were altered with acrylic paints. I stamped over the window to give it a bit of added interest. For the wood veneer hearts, I first applied black india ink with a brush, the brayered over the raised details with acrylic paint to make the texture pop. 😀 The tag on the right was inspired by a journal cover created by Gabrielle Pollacco.

The two tags:

both tags


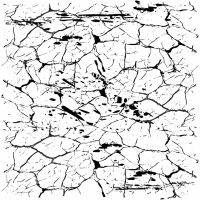
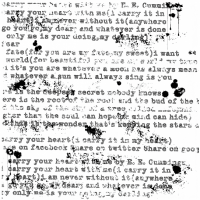
Close ups of the background details:

tag close up 2

tag close up 3


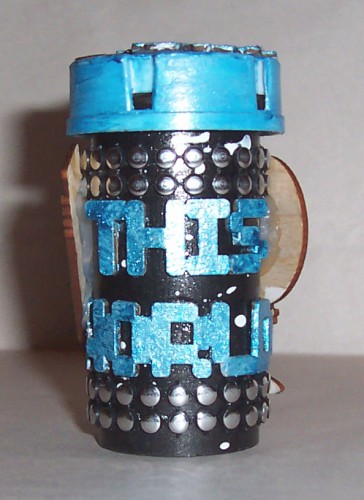
Close ups of the layered pieces:

tag close up 1

tag close up 4


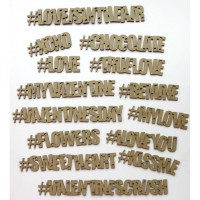
The CE products used on the 2 tags:

mini-quatrefoil-panel-642-600x600full-of-heart-panel-446-600x600distressed-crackle-stamp-637-600x600grunge-music-note-sheet-stamp-409-600x600long-stem-roses-450-600x600hearts-167-600x600valentine-s-hashtags-515-600x600arched-windows-set-of-2-433-600x600branches-set-of-3-862-600x600


Peace – Mixed Media Canvas

Simplicity is the name of the game around my house these days. With school back in session and new undertakings, it’s easy to get overwhelmed, so my project for today’s post on the Creative Embellishments Blog is an easy to create/recreate, mixed media canvas that I find very soothing. It was inspired by this month’s challenge image as well. 😀 It reminds me of quiet, winter nights and softly drifting flakes, so I used 2 lines from the poem, “Stopping by Woods on a Snowy Evening” by Robert Frost.

I started off by masking off sections of the canvas with dry wall tape. I then used a palette knife to apply modeling paste in sections. I let it set for a few minutes, then removed the dry wall tape, which then leaves the grid texture behind. Once that was dry, I spritzed the entire canvas using several shades of Tattered Angels shimmer mist and Lindy’s Stamp Gang Starbursts, applying the lightest shades to the center and the darkest towards the edges. To blend the colors so there wouldn’t be spray shaped splotches of color, I went over the whole piece with a spray bottle of plain water. I then blotted up the excess moisture with a paper towel, and dried it with my heat gun.

I used Versa Mark ink and Lindy’s Stamp Gang EP with my CE Snowflakes stamp to add some more background details. I like to cut apart larger chippies to use on different parts of a project, which is what I did for this one. I altered my chippies by coating the Snowflake Page Corner pieces with gesso, and heat embossing the title piece. I finished it off with a bit of bling. I hope you like how it turned out!

peace


Close up of one of the altered chippies:

Peace close up 1


Close up of the background details:

peace close up 2

peace close up 3


The CE products used for this project:

snowflake corners-600x600love-joy-peace-327-600x600snowflakes-stamp-414-600x600

1st Haircut – Creative Embellishments DT layout

I’ve been holding onto these photos of Christian getting his first haircut for a little while now, so I figured it’s about time I scrap them. 😀 For this page, I used several Creative Embellishments frames, wood veneers, and alphas. I painted all the chipboard pieces, but left the wood pieces as they are. I love the blend of black, white, and wood grain. 😀 I also stamped the border using CE rubber stamps and black acrylic paint and added background details using their chevron stamp as well. Here’s how my page turned out:

1st haircut resized

Close up of the title piece I used and alphas:

1st haircut close up 1


Close up of the layered wood veneers and frames:

1st haircut close up 2


Here are the fabulous CE products I used:

time-flies-frame-set-121-600x600film-strip-picture-frame-set-61-600x600pair-of-heart-s-403-600x600HEARTS -2IN SET 1-600x600scissors-set-of-6-83-600x600chevron wood-800x800tooth-fairy-1st-tooth-710-600x600basic-alphabet-303-600x600distressed-burlap-stamp-863-600x600distressed-chevron-stamp-764-600x600distressed-text-stamp-530-600x600

Incentive Jars – Out of this World/Awesome

My 3 youngest children attend cyber school rather than a traditional brick and mortar school. We recently had a conference with our family coach and worked on setting some personal and academic goals for the kids. I put together these incentive jars for 2 of them (I’m still working on the third) to encourage them to work on some areas that need improvement. My daughter, Madison, is working on managing her time better, so I’ve set a goal for her for when she should be done with her school work each day. If she reaches her goal, she gets to put a marble in her jar. My son, Matthew, is working on reading for enjoyment outside of the school curriculum and also working on his writing skills, so his goal is to read non school issued books and write a report, summary, or review about what he read. His jar is a bit smaller since it involves doing additional work outside of their regular school work. Once their jars are filled, they earn predetermined reward. 😀

To create these, I upcycled pill bottles from the pharmacy (I have far too many of these floating around). I painted them with Viva Maya Gold paints, which are delightfully shimmery! I then splattered white distress paint onto Matthew’s and wrapped trim around his, but wrapped lace around Madison’s. The title pieces were altered with the same Maya Gold paints, but the wood veneers were all altered using PITT markers. Here’s how they turned out:

jar top

jar front

jar Madison 1

jar Madison 2

jar Madison 3

jar Matthew 1

jar Matthew 2

jar Matthew 3

jar Matthew 4


The fabulous CE goodies I used:

school-set-set-of-36-85-600x600graduation-set-748-600x600globes wood-600x600out-of-this-world-title-648-600x600awesome-580-600x600

Previous Older Entries Next Newer Entries