And the Winners Are…

Now for the winners of the blog candy!!! This was the RAK for a random commenter on my blog last week:

The winner of the new My Mind’s Eye, Stella and Rose Collection Hazel “Memories” clear stamps is…Jackie N!!!

I also offered this RAK for a random follower on my blog:

The winner of the new MME Stella and Rose Collection Mabel “So Sweet” clear stamps is…Jolanda!!!

Congratulations to you both! Please email me via the contact button at the top of this page with your addy so I can send out your prizes! Thanks to everyone who left a comment and thank you to those following my blog. I greatly appreciate it! Stay tuned for another giveaway later this month in celebration of my upcoming birthday! 😀

Bo Bunny Card – Challenge Entry

Bo Bunny has a card challenge up that I decided to combine with a challenge on Sketches4All. The sketches were nearly identical, but the twist for the S4all challenge was that it needed to have a black base and include a flower. Though the sketch was for a vertical card, I made mine horizonally. Here’s what I came up with:

Materials:

American Crafts cardstock base
Bo Bunny Gabrielle papers
BB Gabrielle brads
Making Memories ribbon

Adhesives:

Helmar 450 Quick Dry Liquid
Glue Arts Glue Glider Pro Perma Tac

Comments are always welcome and appreciated! Don’t forget I’m also offering up some blog candy for comments left on any post between April 3, 2011 and TODAY! One comment per post per day please! Followers of my blog have a chance to win a separate prize! See THIS POST for further details and pictures. TFL!

Firedog layout – Sketchy Thursdays Challenge Entry

Here’s Matthew when he was 2 years old. His preschool was having a unit on Community workers and had a Fireman visit the school. He had a blast checking out the fire engine. They even let him get inside! As you can see, the teachers went all out. 😀 He came home with his little paper hat with the ears and a little black painted nose. It was so cute! By the time I grabbed the camera, he’d already rubbed some of the paint off of his face, but you get the idea. This layout was based on the Sketchy Thursdays 3.31 sketch:

Materials:

Bo Bunny Timepiece 12×12 cardstock paper
BB Midnight Frost cardstock papers
BB Midnight Frost diecut sticker
BB Timepiece Chipboard
BB Timepiece Dimensional Stickers
May Arts ribbon
Tattered Angle Shimmer Mist
Shimmerz paint
Inksssentials white opaque pen
Sakura Pigma brown brush pen
Distress Ink

Adhesives:

Helmar 450 Quick Dry Liquid
Glue Arts Glue Glider Pro Perma Tac

Tools:

Martha Stewart Doily Lace Edge/Border Punch

Here’s the sketch I used:

If you’d like to enter a Sketchy Thursdays challenge too (this one ends tonight, but they have a new sketch up every week), CLICK HERE.

Comments are always welcome and appreciated! Don’t forget I’m also offering up some blog candy for comments left on any post between April 3, 2011 and April 9, 2011! One comment per post per day please! Followers of my blog have a chance to win a separate prize! See THIS POST for further details and pictures. TFL!

Graphic 45 Altered Box Part 2 – Finished

This project is my entry into Graphic 45’s metal challenge. Since I was hosting an altered box challenge on Paper Secrets last weekend, I used the first few steps as my example project (you can see the post showing the bare wood box and the after for the PS example on this post). I took it further for the Graphic 45 challenge since the point of that challenge is to include at least one of their new metal staples (embellishments) in your project. Well, last month I won the new G45 Le Cirque 12×12 paper pad, a Geometric metal knob and door plate staple and envelope tag staples on their blog. THANK YOU G45!!! To thank them properly, I thought it would be a good idea to use these items for the challenge. 😀

These photos pick up where I left off in my earlier post.

Here’s the exterior of the box:

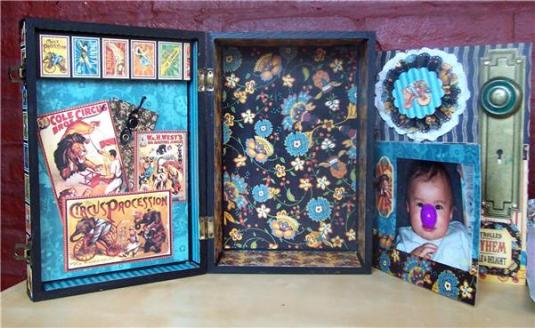
When you open the box, on the left you see some of the cutouts that come in the paper back layered with a tag envelope staple tucked behind them:

Those cutouts are actually glued to a piece of repurposed chipboard to create a pocket that the envelope slides into. That way, I can hide special messages to my son in the envelope and it’s easier to add and remove the message. Also, if the envelope gets damaged from use, I can just replace it. 😀 On the right you see a photo of my son “clowning around” along with some embellishments, including the new metal knob and door plate by G45. 😀 Here’s what it looks like w/the envelope removed:

If you lift the flap the photo is mounted onto, it reveals 2 more photos mounted underneath:

You can also use the knob to lift out that entire section which is actually an insert that hides half the depth of the box, so it has a hidden compartment. Here’s the box with the insert removed:

I’ll have a tutorial on how to make the cardboard hidden compartment in another post at a later date. Hope you liked my project!

Materials:

unfinished wood box (from craft store)
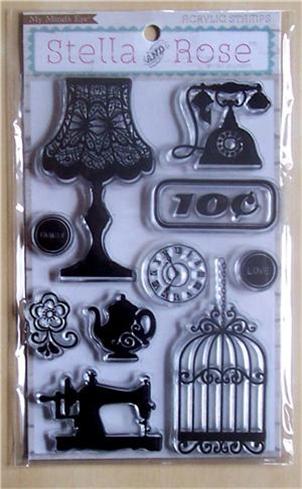
Graphic 45 12×12 Le Cirque Paper Pad
G45 Geometric knob and door plate staple
G45 Tag Envelope Staple
doily
Folk Art acryllic paint
cardboard
chipboard

Adhesives:

Helmar 450 Quick Dry Liquid
Glue Arts Glue Glider Pro Perma Tac
Mod Podge (though I’ve heard you can use Helmar’s Acid Free Glue for decoupage)

Tools:

Sponge brush
EK Success scalloped circle punch
Martha Stewart doily lace border punch

Comments are always welcome and appreciated! Don’t forget I’m also offering up some blog candy for comments left on any post between April 3, 2011 and April 9, 2011! One comment per post per day please! Followers of my blog have a chance to win a separate prize! See THIS POST for further details and pictures. TFL!

Previous Older Entries Next Newer Entries