Happy Birthday, Wild One Card

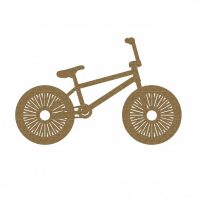
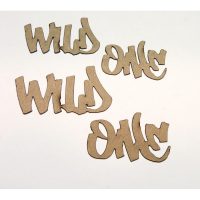
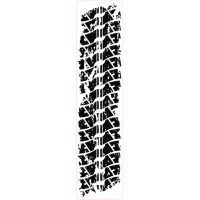
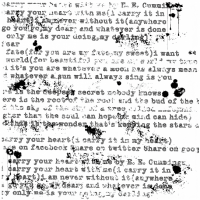
My youngest son is turning 6 years old, in just 9 days. I’m still amazed at how quickly the kids are growing! Christian is our little Wild Child, so I thought a slightly rugged theme would suit him. To create the card, I started with the Distressed Text Stamp and stazon ink. I only inked sections at a time and blotted it to the card. I then used versamark ink and the Distressed Brick Stamp and positioned it where I wanted. Using a small wooden cuticle pusher, I added touches of light tan and dark brown embossing power to bits of the brick, then covered the rest with a terra cotta colored embossing powder, then melted with a heat gun. Last, I used a brayer to apply black acrylic paint to the Tire Track stamp and applied it across the card. I did want it darker than it is, but didn’t want to mess up the whole card front redoing that part. lolΒ To alter the wood veneer balloons, youth bike, and title pieces, I coated them lightly with gesso, then went color by color using a glue pen and different embossing powders. Before adhering the embellishments, I splattered the background with Lindy’s Stamp Gang moon ink, Starburst ink, and India ink. I used foam adhesives to pop up the balloons and a flair button that’s meant to look like one of those circular mylar balloons. I added thread to act as strings for the balloons and added a bow to show that they’re attached to the handlebars of the bike. Here’s how my card turned out:

happy birthday wild one featured

happy birthday wild one full

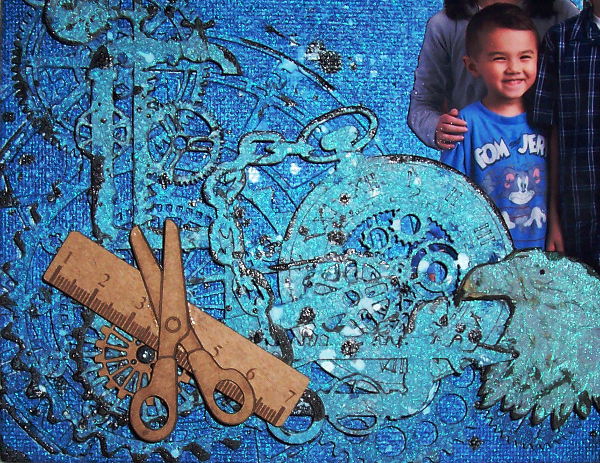
A close up of the Bike:

happy birthday wild one close up 1

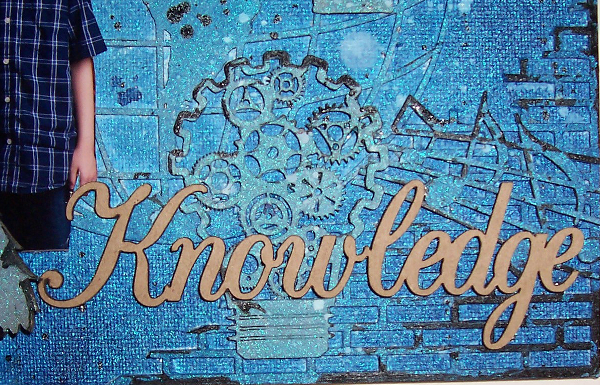
Close up of the title:

happy birthday wild one close up 2

The fabulous CE pieces I used:

youth-bike-660-600x600wild-one-title-368-600x600Happy Birthday-800x800birthday-fun-242-600x600tire-track-1-stamp-415-600x600distressed-text-stamp-530-600x600distressed-brick-stamp-639-600x600

Penn State York Bridge Building Contest

This year, Alex participated in the Penn State York Bridge Building Contest and came in 3rd! Everyone was pleasantly surprised since it’s rare for Freshmen to place at all. Most of the winners tend to be Juniors and Seniors each year. πŸ˜€ He was so proud of his creation (which shattered during testing, which happens to nearly all the bridges).

For this page, I was inspired by the CSI, Color Stories Inspiration case file #196 that we’re sponsoring. Be sure to check out their challenges this month for your chance to win the gc to the Creative Embellishments store that’s up for grabs, along with tons of other fabulous prizes! πŸ˜€ Here’s what I came up with:

alex scaled


I chose glasses, cogs, gears, technology accents, and circles for my evidence. Most of the pieces were altered using acrylic paints or mists. For the testimony, I incorporated the word, “technology” into my journaling. Here are some close ups of the layered pieces:

alex close up 1


alex close up 2


The CSI inspo board for case 196:

196copy

CE products used:

steampunk-frame-112-600x600gear-set-2-large-711-600x600gear-set-2-medium-712-600x600gear-set-2-small-713-600x600lightbulbs-865-600x600rings-for-so-many-things-483-600x600steampunk goggles set-600x600tools-662-600x600binary-stamp-635-600x600distressed-grid-488-600x600

LOVE Fairies – Home Decor

love 1

I finally got a chance to play around with the fabulous Creative Embellishments’ February Mixed Media Kit. I absolutely loveΒ everything that’s included! There are tons of fun bits like wood veneer mini tags, title pieces, flowers, acrylic words and hearts, metal embellishments, along with a full sized mist and embossing powder too! Be sure to check out the pic at the bottom of this post that shows everything that comes in the kit! πŸ˜€

Since I wanted to create a piece to go in my daughter’s bedroom, I decided to go with a fairy theme. She adores everything magical and mystical, especially fairies. πŸ˜€ To start out, I peeled of the protective layer that’s over the acrylic to keep it from getting scratched in transit, then used modeling paste and the stencil that comes with the kit and applied a thin layer to the back of the LOVE word piece. Once that dried, I used 2 different colors of Maya Gold metallic paint to coat the back of the Love piece and the base. I used a pink shade for the word and a purple for the base. Once that dried, I applied a Hematite shade to the edges of both pieces. Β To alter my fairies (sold separately), I used PITT markers and coated the wings with a metallic blue Maya Gold paint. Then finished it off with flowers from my stash and the metal butterfly piece from the kit. Here’s how it turned out:

love 2


There are sooo many awesome goodies in the kit, I decided to make a tag to go with it. To create the tag, I used one of the precut chipboard tags as my base, blotted it with a light gesso, then stamped over it with the CE script stamp. I then added one of the chippy heart arrows, and 3 of the flowers from the kit, pearls from my stash and a flair button (sold separately) and added a large flower from my stash to anchor it. A bit of ribbon and it was done. How easy is that? πŸ˜€ Here’s how it turned out. Left is without a flash, the right is with a flash.

love 3


This final pic just shows how I dabbed the dark metallic gray on the edges of the piece to give it a bit more dimension. πŸ˜€

love 4


I hope you enjoyed my project as much as I enjoyed making it! I also hope you check out the fabulous February Kit. After making both these pieces, I still have enough product left over for a layout and another tag or two!

kitfairy set 600x600fairy trio-800x800distressed-script-stamp-529-600x600


Driven to Learn – Mixed Media Canvas for Creative Embellishments

Since my youngest 3 children attend cyber school, we were able to have 3 of the children in a single school photo. πŸ˜€ For this piece, IΒ fussy cut to remove the background, then set the pic aside until the end of my project. I started out by adhering my first layer of chippies and coating everything with gesso. As that was drying, I lightly coated the other layered pieces with gesso as well. I then started with the darkest shade of blue mist used and sprayed the border of the canvas board. After adding the Steampunk Corner pieces, I misted again using the same color around the outside edges. I then added the next layer of pieces which included the Mini Hot Air Balloon, Steampunk Light Bulb, Steampunk Pipe Corner, Pocket Watch, and Music Borders and sprayed the whole project with a lighter shade of blue. After that dried, I went over splattered the project with white distress ink and black india ink. Next, I went over some of the edges with black ink to give the layers a little more contrast. I then tucked my photo under the layers and added the eagle piece that I misted with the lightest shade of blue. Last, I added the bare chipboard pieces. Sorry my pics aren’t very clear. Between the glossy photo and the shimmer from the mists, I kept getting a glare, but the pics are blurry without a flash. I’ll try to replace the photos once I can get some daylight. πŸ™‚


driven to learn 2

driven to learn close up 1

driven to learn close up 2

driven to learn 1


CE products used on this project:

6×6 Mini Brick Panel

Large Clock Face 5″

Steampunk Corner Set

Steampunk Pipe Corner

Steampunk Pocket Watches

Mini Steampunk Hot Air Balloon

Steampunk Light Bulbs

Globes 6″

Music Borders

Eagles

Chalkboard Frame Set

Gear Set 2 Medium

Journey Word Set

Way To Go

Adventure Word Set

Previous Older Entries Next Newer Entries