Creative Embellishments/Heartfelt Creations team up!

I’m a huge fan of Heartfelt Creations’ products. I love their stamps and dies, but more than anything, I LOVE their gorgeous papers, so I was thrilled when I heard about the team up between two such amazing companies! I got to work with HFC’s Once Upon a Time Papersand Celebrate the Journey Papers. Since two other team members used Celebrate the Journey, I primarily used Once Upon a Time for my project along with a few scraps from other HFC papers I already had on hand. This is going to be photo heavy because it’s a paper bag mini album (my first!), using 3 full sized paper lunch bags.

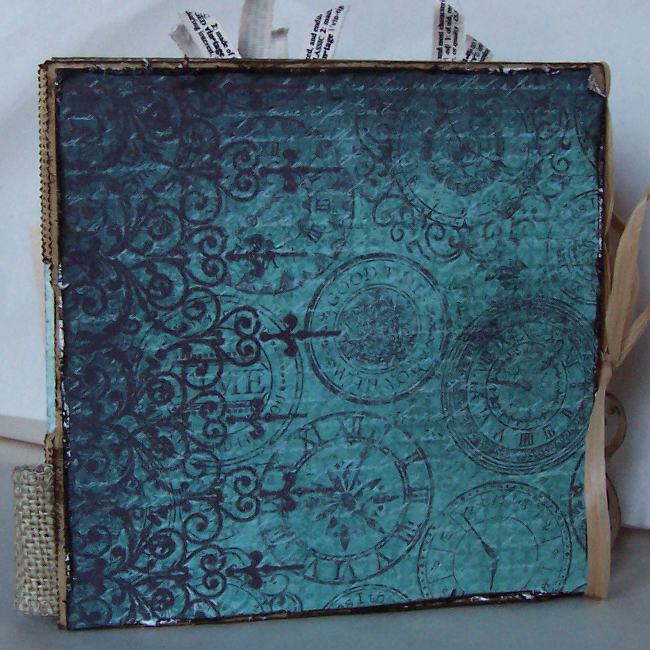
For the cover, I also used these products by Creative Embellishments which I altered by using Smooch inks: Steampunk Timepiece from their 3 piece mini set, a Butterfly from their 3 piece set, Flourish 17 and Photo or Page Corners Set 2. Distressed edges on the papers are inked with Distress Ink and the trims are by Graphic 45 and My Mind’s Eye. I also used the other corner pieces from the set as holders for tags inside the album. :-D

The Cover:

100_9798

100_9802

Back Cover:

100_9804

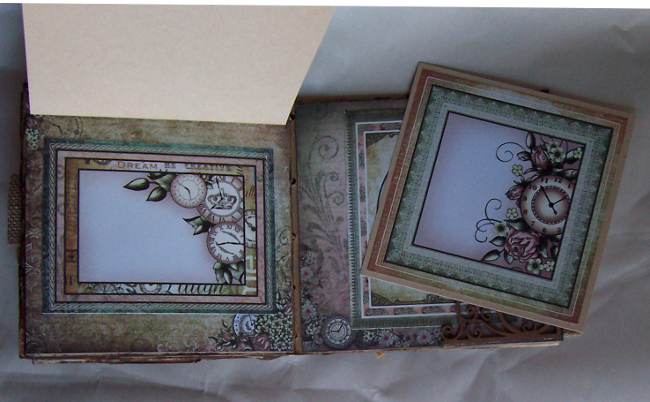
1st Spread with the left flap closed:

100_9806

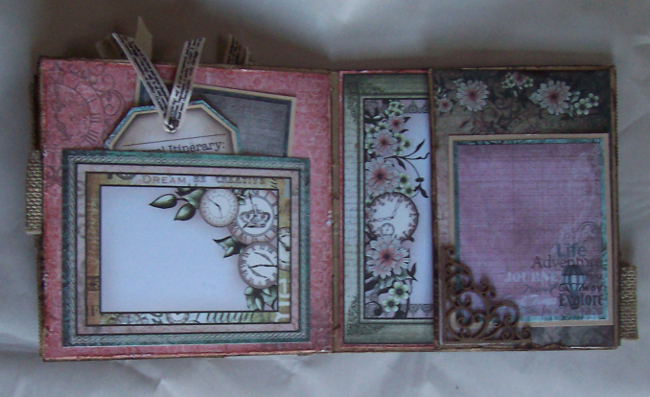
1st Spread with the left flap open:

100_9808

2nd spread with the right flap turned into a pocket:
100_9813
Center (3rd) Spread:
100_9815
4th spread with the right flap closed:
100_9816
4th spread with the right flap open:
100_9819
5th spread with the left flap closed and tag inserted on the right:
100_9821
5th spread with the left flap lifted and tag removed on the right:
100_9822A few of the 29 removable tags for photos and journaling:
100_9824
To check out the rest of the team’s creations, visit the Creative Embellishments Blog here: CE Blog
Advertisement

Making Faces – dt layout for SWAT drill #13

SWAT’s drill #13, our first challenge for August, is all about trendy triangles! Use this trendy geometric shape anywhere on your page or project in any way you’d like, in as many ways as you’d like, then link it up on the SWAT sidebar for your chance to win a $20 gc to 3 Scrappy Boys!

For my example, I used a triangle stencil by Prima, handcut paper triangles (I started with squares, then cut them in half diagonally) and burlap cut into triangles for a banner. Here’s what I came up with:

Materials:

7 Dot Studios papers
burlap from my stash
Krylon webbing
Liquitex white acrylic ink
flexible modeling paste
4 different washi tapes
October Afternoon mini market alpha stickers
Pink Paislee Cushies alphas
Prima flowers
Faber Castell Pitt Artist Pen Big Brush markers
Prima stencils

TFL! If you’d like to check out the other DT projects or to play along with our August challenges, CLICK HERE!

Our Home on the Range – layout for SWAT drill #12

The S.W.A.T. drill #12 is a fun sketch by Lanette with an added twist. You can only use patterned paper, no solid cardstock or papers on your layout. The prize you’re playing for is a Webster’s Pages grab bag put together by Lanette and all entries are due by 11:59 pm EST on the 28th of this month.

For my take on the sketch, I chose Sasparilla papers and stickers by October Afternoon. They were perfect for my pics of Christian dressed up in Matthew’s Woody (from Toy Story) Halloween costume from last year. He’s wearing the fake boots and the cutie hat and sitting on top of their Lego table. To create a little scene, I fussy cut one of the pics and perched him on the fence chippy layered w/some Dusty Attic laser cut chipboard pieces. This is how it turned out:

This is the fabulous sketch Lanette came up with for the challenge:

Materials:

October Afternoon Sasparilla papers, chipboard stickers, cardstock stickers, alphas
Dusty Attic chipboard
burlap
Acrylic paint
Iridescent Medium
gesso

Adhesives:

Scotch ATG
Helmar 450 Quick Dry
Helmar liquid scrap dots

TFL! If you’d like to play along with this challenge or the other challenge this month, CLICK HERE.

Music to My Heart – layout for the Scrap That round robin

Scrap That is hosting a July round robin (sign ups are now closed) and I decided to play along. It’s been a long long time since I’ve participated in one, so I had a blast! The set up is a little different than I’m used to. Before, the one I was in was a blind round robin where the first player on each team lifted the same layout. Then each person on the team lifted the layout of the person before them and participants did not see the original layout or the other players pages until the end.

The Scrap That round robin works differently. We were split into 4 teams and player 1 on each team is a dt member. They post a layout in the forum for the player #2 on their team to lift, then player #3 scraplifts player #2’s page, etc. Each participant has 1 week to complete their lift and post it to the appropriate thread in the forum.

I’m on team 4 and was assigned week 3. Our team leader (the Scrap That dt member leading our team) is Tracey Gregory. She posted a gorgeous page that Leila then scraplifted and I got to lift Leila’s page. There were so many fabulous details to be inspired by that I had a blast working out what I was going to do with my page. Here’s what I came up with:

Materials:

Prima Nature Garden papers, flowers, journaling notecards, alphas, stamp
Dusty Attic chipboard border, butterflies and flourishes
Tim Holtz film strip ribbon, distress stain, paint and ink
Alphas, burlap and lace from my stash

Adhesives:

Scotch ATG
Helmar 450 Quick Dry
Helmar Liquid Scrap Dots

TFL! To see Leila’s page that I lifted or the other participants pages, CLICK HERE (you do need to be registered to the forum to view).

Previous Older Entries