I’m up on the Creative Embellishments blog with a quick and easy card Father’s Day card this week. Seems like I’m always pressed for time these days whether it’s during the week and I’m running one son to school and cyber school 2 others with my almost 4 year old running around, or it’s the weekend and they’re all home and looking for things to do. 😀 So why a quick, easy card for Father’s Day which is quickly approaching? I altered all the chippies and veneers with gesso, acrylic paint, distress stain and Pitt markers. Here’s how it turned out:
Father’s Day Card – Creative Embellishments
12 Jun 2014 Comments Off on Father’s Day Card – Creative Embellishments
Beach Canvas – dt project for Creative Embellishments
05 Jun 2014 Comments Off on Beach Canvas – dt project for Creative Embellishments
in Cards and Projects Tags: beach, black gesso, canvas, Creative Embellishments, Jacquard Lumiere, laser cut chipboard, mixed media, shells, Shimmerz Texturez
Since I didn’t get to provide an example for the June Creative Embellishments challenge this month, I thought it would be fun to create one for my Thursday project. Here’s the canvas I created to go with the inspo image and nautical theme this month:
CE products used on my project:
CE Nautical Lighthouse
CE Nautical Star
CE wood veneer stars
TFL!
Nail wrap file box – otp project for Creative Embellishments
29 May 2014 Comments Off on Nail wrap file box – otp project for Creative Embellishments
in Cards and Projects Tags: coupon holder, Creative Embellishments, file box, flair, Jamberry Nail wraps, laser cut chipboard, organizer, Webster's Page
Hi everyone! It’s Thursday, so I’m up on the Creative Embellishments blog with an off the page project for you today. 😀 I recently signed up as a consultant for Jamberry nail wraps along with my bestie Nicolle. Now that I’ve been with them a little while, I’ve built up quite a stash of nail wraps and needed a way to store and organize them. Luckily, I have a whole scrapbook stash to play with, so I created my own, using a coupon organizer type idea. There are separate compartments and I left room between the dividers and the top to add labels for my dividers later. Here’s now it turned out:
Close up of the dividers attached to the side. You can see I’ve left about half an inch for the tabs to be added:
A close up of how they sit inside:
Closed up with everything inside. I did not adhere the top of the frame or the flower cluster so that I can tuck the flap under them as a closure. 😀
Materials:
Creative Embellishments Art Flair
CE Ornate frames
CE Gooey Alphabet
Webster’s Pages papers, trim and bloomers
I am Roses flowers
Pitt artist marker
Martha Stewart border punch
TFL!
Cards with pencil toppers – project for Creative Embellishments
15 May 2014 Comments Off on Cards with pencil toppers – project for Creative Embellishments
in Cards and Projects Tags: 13 Arts, cards, children, die cut, encouragement, flair, laser cut chipboard, mixed media, pencil topper, reward, stamping
Hi everyone, I’m up on the Creative Embellishments Blog this week with a couple of simple cards for children. Two of my kiddos are in cyber school and I’m always looking for different ways to reward and encourage them for a job well done and sometimes, just to reward their efforts. So quite a while back, I special requested these title pieces in order to use them for my own children and Nicolle was happy to oblige. She totally rocks! 😀 Did you know that if there’s something you have in mind, but do not find it in the store, a quick email to Nicolle could result in having it created for you? Yeah…she’s awesome that way. ;-D
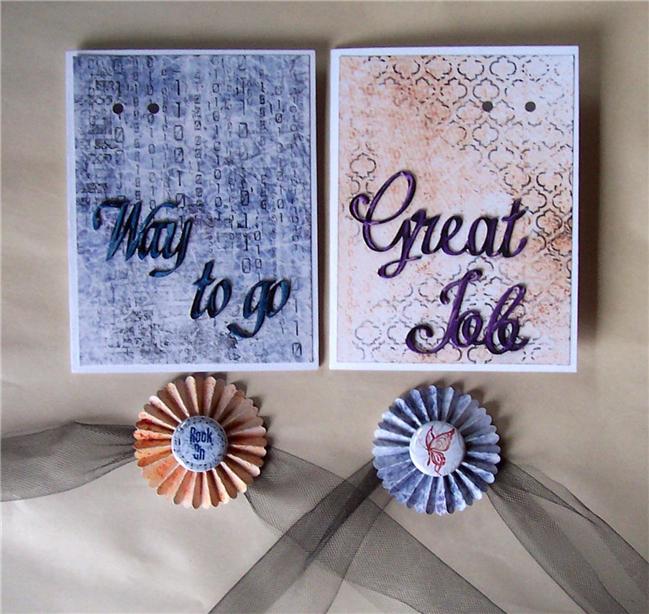
Anyway, I’d originally intended them for tags they could display by their computers like ribbons, but at the last minute, I decided to make these interactive cards, with a reward attached. I’m all about simple these days since I’ve taken on a little more than I can chew for the moment, but I’ll adjust. lol So these cards, could be created with more layers, details, and elements, but I went with simplicity. Here they are assembled:
This is with the toppers removed from the cards. As you can see, I just punched two holes to string the ribbon, or in my case tulle, through.
Here’s how the topper looks attached to a pencil. Tip: If you find that it slides down your pencil, just wrap a small rubber band around the the end of the pencil as a stopper. 😀
TFL!


