
As promised, this is a quick and easy gift bag tutorial to help with ideas for my challenge in the Creative Embellishments online Birthday Crop in their Facebook Fan group. This base template is highly adaptable to make a variety of sizes and designs. I’ll mention a few variations at the end of the tutorial. The measurements I used for this base results in a bag that is 5 ¾” long x 2″ wide x 5″ tall, with sides that are 3 1/8″ high. I used plain white cardstock for this tutorial so I could draw the score lines and write directly on the template. When selecting patterned paper for this project, keep in mind that the paper will wrap around to the back, so you’ll want to use a design that is not directional/direction specific (otherwise, if the front is face up, the back will be upside down).
Start out with 12″ x 12″ paper.

Score your page at 3 1/8″ and 8 7/8″ (which is 3 1/8″ in from each side) as indicated by the black vertical lines.

Rotate your paper 90° and score at 5″ and 7″ as indicated by the purple lines. These will be your horizontal lines once you straighten the page again.

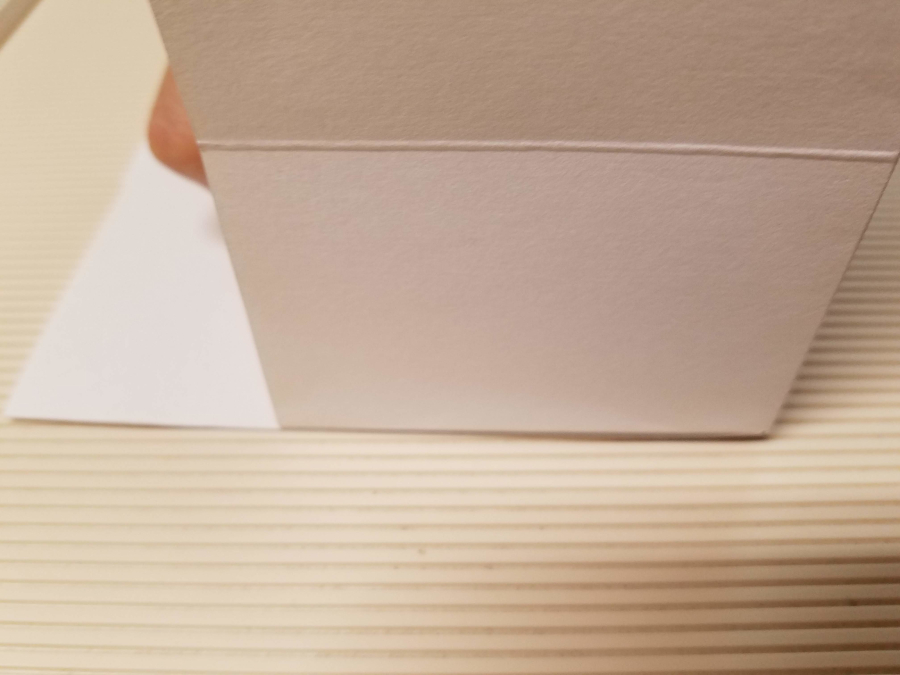
Fold in on all 4 score lines.

You’re going to create a 45° fold where I’ve indicated with a line in the photo. You do not need to score this. You will create this fold starting at the corner where I’ve written 45° by bringing the horizontal scored line up to meet the vertical fold line. Doing this will automatically create a 45° angle.
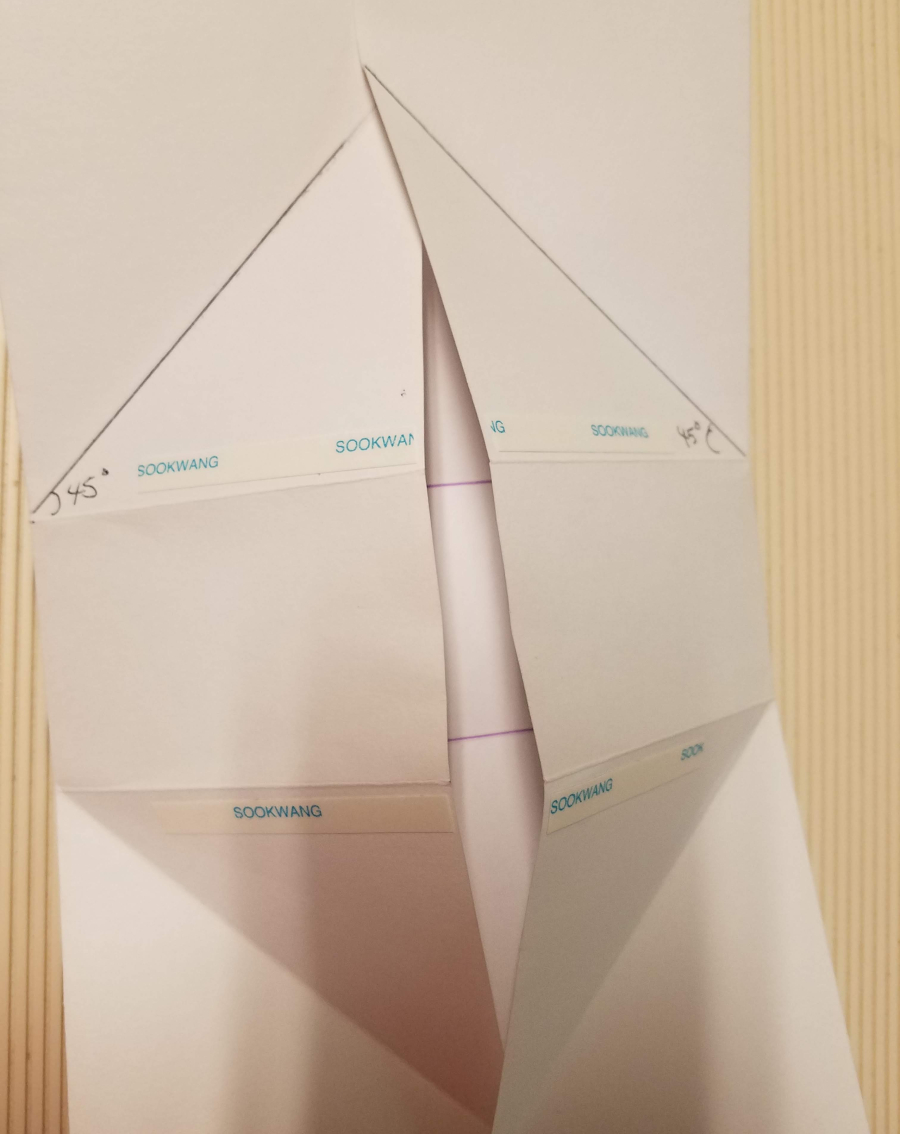
This is what it looks like when you bring the horizontal fold line up diagonally to meet the vertical fold line on the left. Press that new 45° fold firmly to create a crisp line.

Do the same on the right side, then rotate it upside down and do the same on the other end.

You can see the new diagonal fold lines in this photo (my pen lines are on the other side. Make sure all your creases are in place before the next step. Once you have your fold lines complete, apply your adhesive where shown in this photo, going from the corners of the paper to where it meets the diagonal line. You can use a tape runner, double sided tape, glue, etc. Just do one side at a time, folding on the 2 vertical creases.

The 2 flaps should overlap slightly and you should be able to smooth it flat. I’ve puckered up the center in the photo to show that the center is not glued down. The adhesive is only going from the diagonal folds to ends.
Apply adhesive as shown in the photo. It should run along the horizontal fold lines, in triangle shaped sections created by the diagonal folds.
Bring the horizontal folds up diagonally to meet the vertical folds as you did before, but adhere them this time.

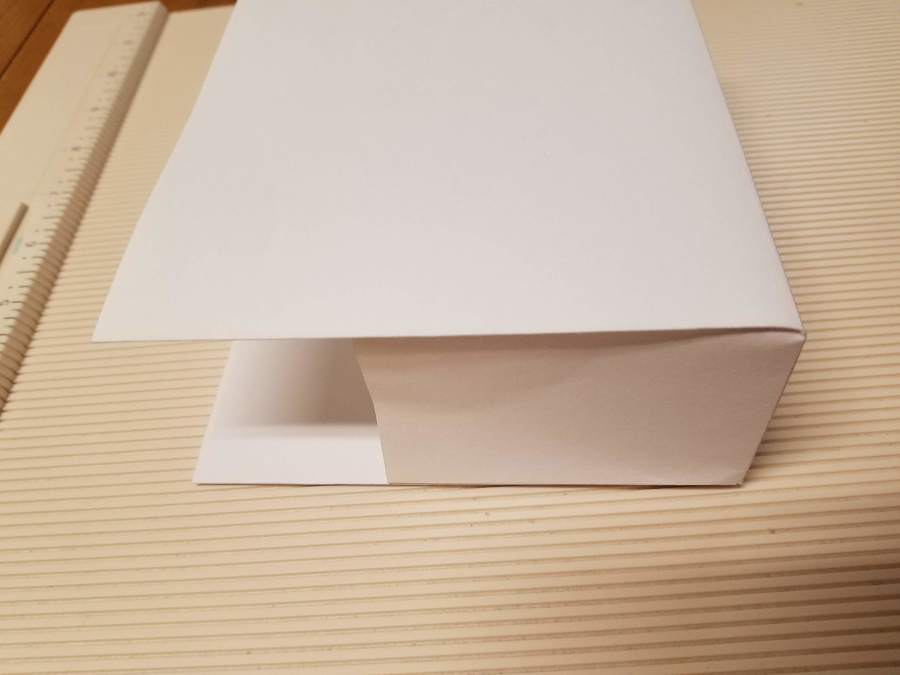
You should end up with a rectangular base that stands up on its own. Tuck in the sides and pinch lightly (as shown in the photo) to get the expandable sides that look best if you want to seal the top of the bag. You can either staple it shut, or punch holes and add ribbon to tie it. Leave the sides as they are if you want to punch holes near the top and and handles.
This is the first one I ever made (8 years ago or so?)…

As you can see, for that one, I tucked in the sides and pinched it to create the triangle sides so it closed smoothly when sealed by tying it with a bit of ribbon. You could add handles rather than sealing it by using the same holes and just adding the ribbon differently.
This is one I made more recently:
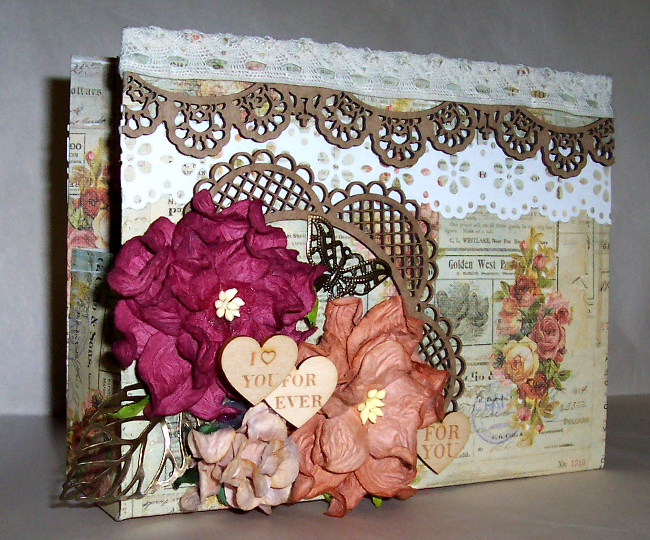

This one was for my daughter and I was just leaving her a gift on her desk for Valentine’s Day, so I didn’t want handles and I didn’t want to seal it either. I decided to fold the top flaps in a little over an inch to shorten the overall height.
I hope you found this tutorial helpful!
Play along with my challenge (either make a package or alter one! So either take an empty container and alter it or make an envelope box, gift bag, etc.) in the Creative Embellishments Birthday Crop for a chance to win this amazing prize:

There are a total of 8 mini challenges available and 8 incredible prizes (FOUR $30 gift vouchers and 4 prize packs):

Use of CE products is not required in order to enter and win the challenges, but if you do use CE products, you can also enter your project to win this gorgeous prize pack:
For full details, join the fb group here: https://www.facebook.com/groups/1985585078160468/ and click “going” on the event to view all the challenges. Entries are due by midnight ET Sept 17th (12 am ET Sept 18th).


